Saturday, May 30, 2015

Homemade Sweetened Condensed Milk

A very blessed day today! The Mr. and his baseball staff and team continue their season as the Class 2A Sectional Champions. Just to give you an idea of how our life is between the Middle of March and end of May ... our calendar shows just under 60 games between 3 schedules and almost half of those have been in May alone (wowzeers, it's now wonder we are beat)! It's a crazy life being the wife of a varsity coach and raising 4 children and there are days I am just not sure what I have got myself into ;) BUT when each day is done, the house is quiet, and I can step back and reflect without an endless amount of requests it's with a full heart.

I am looking forward to the day when I can get back to posting these in the afternoon, but until then here is yet another late night one!

How to Make Your own Sweetened Condensed Milk

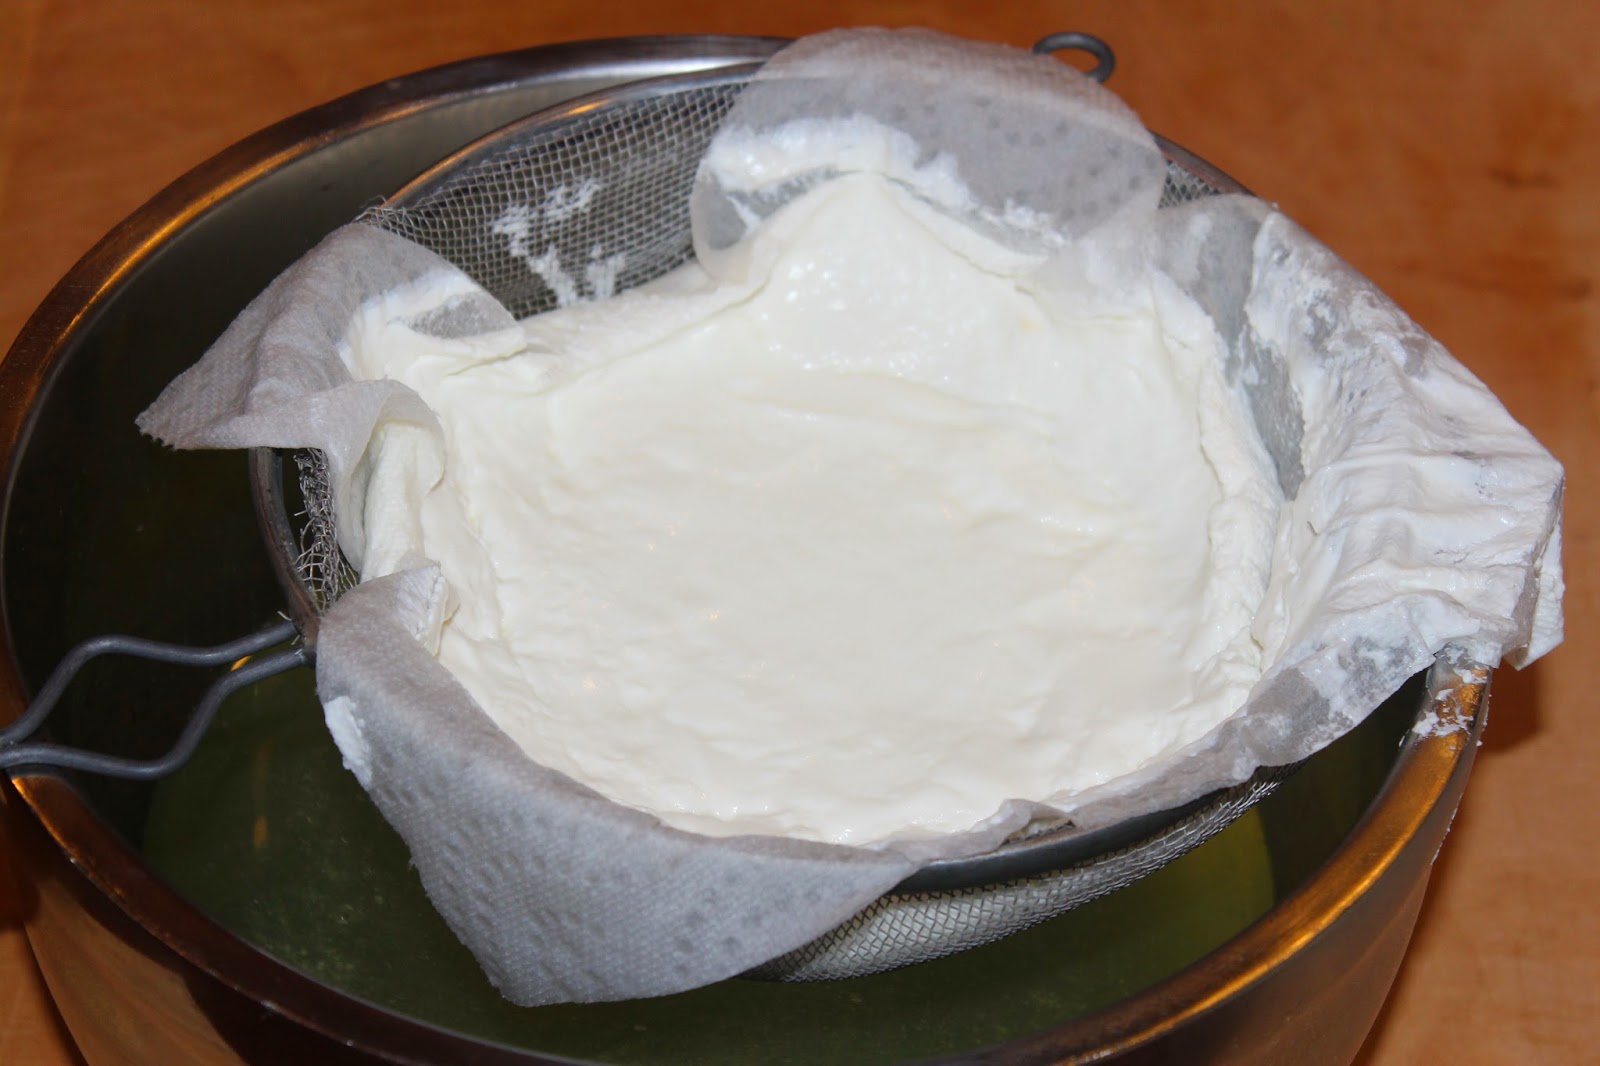
I have decided I will be using evaporated milk and sweetened condensed milk more often now that I have taken the time to make it at home. To make this somewhat time consuming task doable for our lifestyle I can see myself  making a larger batch of evaporated milk and then use it when needed. This recipe is adapted from Just as Delish

thickness after 10 minutes of cooling

Homemade Sweetened Condensed Milk

1/2 cup sugar
1/2 tablespoon of butter

Heat milk over medium heat. Add sugar and bring to a slow boil. Stir every minute or two. Simmer for 15-20 minutes. Remove from heat and add butter. Allow to cool. Store in an air-tight container in the refrigerator or use immediately. To use after being chilled allow to come to room temperature or whisk with a small amount of water. 

slow boil

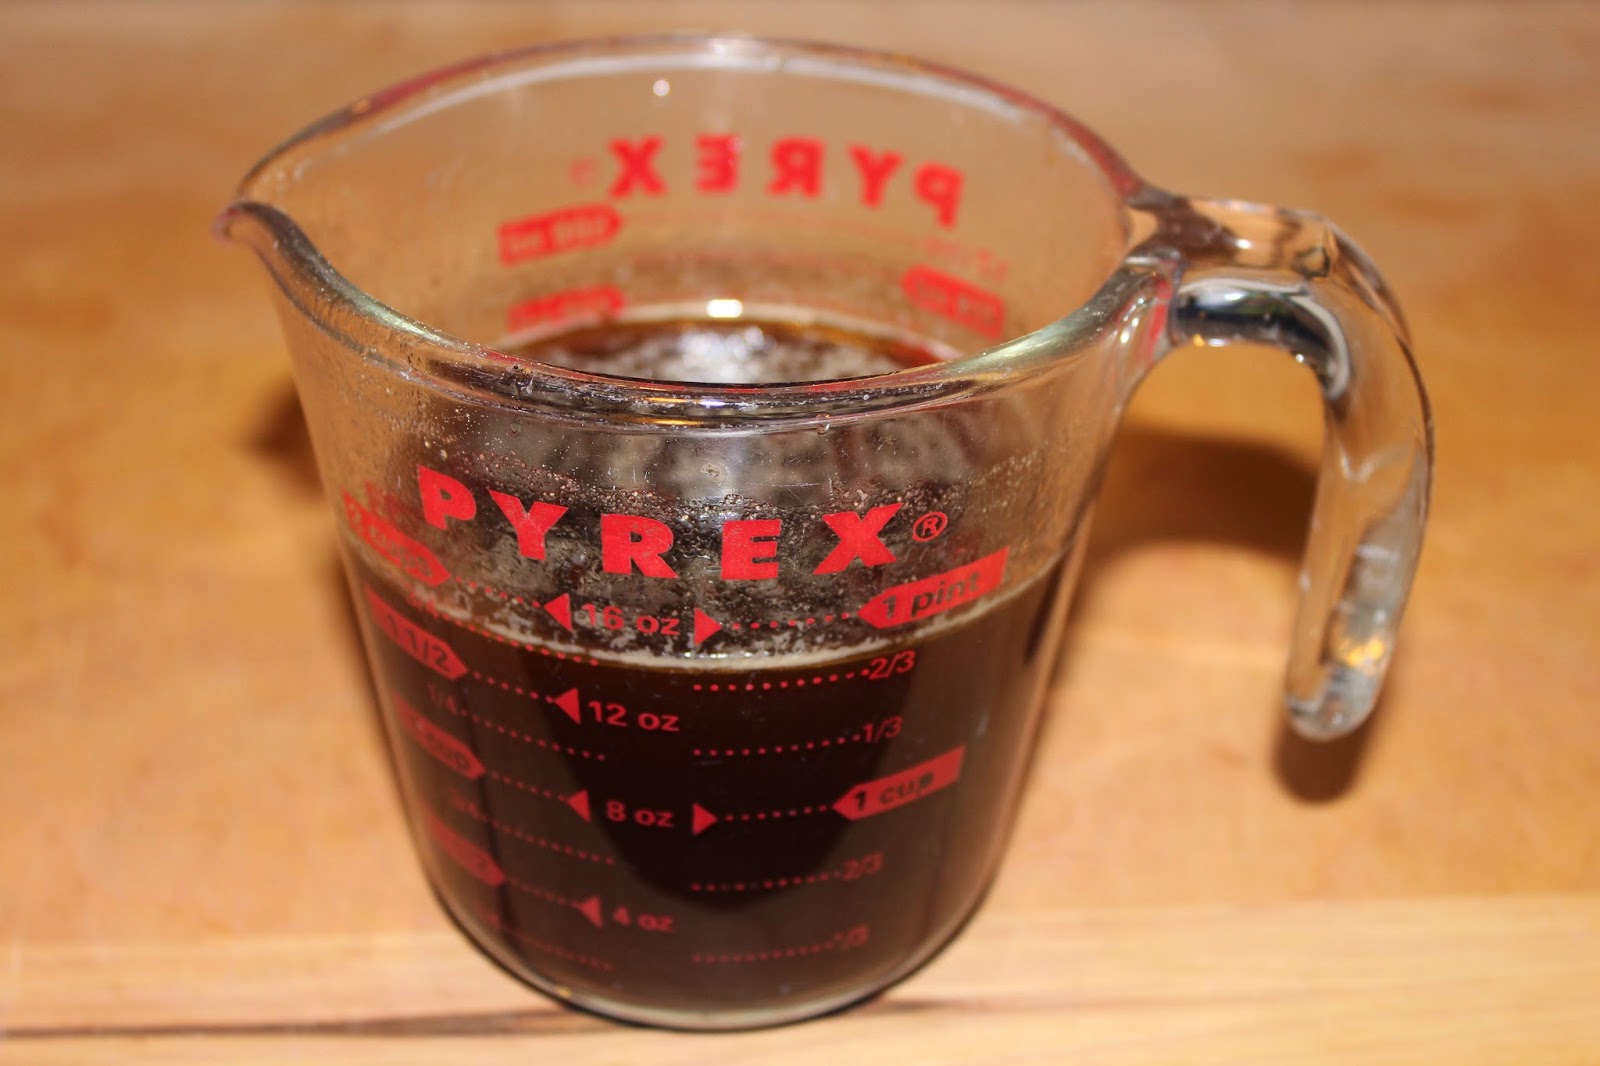
simmer until you reach this consistency 
Looking forward to seeing how thick this is in the morning, but for now it tastes perfect and I am going to bed!

Today's Question: What is your favorite use for sweetened condensed milk?

Updated 5/31/2015 - This morning when I check on the sweetened condensed milk, I was relatively pleased with the thickness. It was not as thick as store bought but that I am this sure could easily be tweaked by simmering it a bit longer.

Although I didn't make something today I felt stood on it's own for a post, I did try a caramel dip recipe that called for sweetened condensed milk. The kids loved it but I will be making some changes or trying out a few other recipes. Tammy's Recipes is were I started, but since I only had 1 cup of evaporated milk, I made half a batch. 

Ours didn't turn out near as dark, but I am assuming this could be not using dark brown sugar. Since caramel is probably my all time favorite sweet (I'd choose caramel over chocolate anyday) I am a little picky and will keep working on this until I have it just right. 

This whole making everything homemade has made me realized I can treat the kids without breaking the bank. A small container of caramel dip (don't get me wrong the store bought it way better at this point, but not for long ,.. I am determined) at the local grocery store is $3.99.  1 pound of ground beef OR small container of caramel apple dip?!?!? Yes, I know you can buy it cheaper at other places but I could make the caramel dip way quicker than raising, butcher, and grinding my own beef! Sorry to all those that are vegan or vegetarian, we do eat meat around here. :)


Friday, May 29, 2015

Homemade Evaporated Milk

Well the day finally arrived that I didn't get a post or an update in, such a sad day {tears and sniffling}. No worries the sadness was short lived because that's life ... there comes a time when you have to be willing to let go (even if it's something you are working really hard to do) because other things surface and need your focus or because there is just no time. Letting go can be very liberating, if you have never tried it, I strongly encourage you to do so! It's that moment when you say, "Okay God, I trust you and leave it at that!" No what ifs, no whys, no how comes, no if onlys, no buts, just I trust you. :)

Many times I find if I didn't get something done one day, it hangs over my head like a dark cloud until I get it taken care of ... so discouraging and gloomy, ugh. This time I chose to let it go and decide I would just do two posts one of these next couple of days when I get a chance and that would be that. Everything will get done when it has to, but not everything has to get done today! Such a dramatic difference in emotions, much more relaxing and peaceful; I really need to take this route more often. I also love moments throughout the day (that could have been stressful because I started behind before I ever even woke up ... I am sure you all know that feeling) when I sense God elbowing me saying ... "See, I have better things in store for you!" Just one of these moments today was when I stopped to grab a few things at the grocery store and my total was $7.77, I had to smile and thank God for the reminder that He is always around and knows what He is doing.

How to Make Your Own Evaporated Milk

There are a couple ways to make evaporated milk and I have decided on trying these two. One uses dry powdered milk and water, the other heats your milk to evaporate the necessary about of water out to be the consistency that is needed.

Evaporated Milk with Dry Milk

2/3 dry milk
3/4 cup of water

Mix ingredients together until the powdered milk is dissolved. Store in air tight container in the refrigerator. 

I found this recipe from the Urban Baker. I would prefer not to use this method: one because there is a more natural way than using dry milk and two because if I didn't need dry milk to make bread in my bread machine, I would have had to go out and buy this! But since I already have dry milk on hand this would be a good alternative. 

Evaporated Milk using Heat

2 1/4 cups of whole milk

Start with 1 cup of milk in a saucepan. Measure the depth of the milk using a toothpick and making a indention. Add the remaining milk and bring to boil over medium heat. Stir continually with rubber spatula. Reduce heat to low and simmer. Stir every 5 minutes, removing any skin each time. Continue this until the milk level reaches the depth marked on your toothpick. Strain evaporate milk into a container with a lid. Store in the refrigerator. Makes 8 ounces (1 cup) of evaporated milk.

This process was from Made Man and I can see myself using this more often. 

We don't use recipes for evaporated milk primarily because it's one more ingredient that would need to be added to the grocery list, so we just nix most recipes that call for it. :)

Today's Question: When do you use evaporated milk?

Wednesday, May 27, 2015

Just a Pinch

Here it is almost 10 pm and I am just know realizing I never stopped to transform something store bought into homemade today. As I was wracking my brain of something I could post about that would be quick I decided we could use a little pick me up instead, so here is a pinch of encouragement for you and me!

It really only takes a pinch of encouragement to keep us going through the hard times, exhausting times, busy times, frustrating times, why-is-no-one-listening times! A simple gesture, a hug, act of kindness, a good deed, and lending hand can totally brighten almost anybody's day. This is something I know I could do more of and half the time I just plain forget due to the overflowing plate I always seem to be carrying around. But I have found it's on those days when I am feeling drained without much energy in my reserve tank are the days I need to do this the most.

Throughout my Homemade Day by Day process, I am realizing it has been well more than eliminating unnecessary ingredients, saving money by making it myself, and creating a healthier home for my family. I have learned so much about what makes me happy. So often we see how others do things or handle situations or what they have to give and try to mimic it because they are some one we see as happy or "have it all together". I have taken notice in the little things about me; how I respond in different situations, who I decided to talk to or not talk to and why, the gifts I have been given to bless others with, and the personal challenges I face through my flaws as a person.

We are raised to be looking out for the other person, treating others as we want to be treated, sharing with those around us, and the list goes on! The focus has very much been placed on others most of our lives, and sometimes this focus on others turns into judgement of them. The interesting thing is we cannot become who God intended us to be if we don't turn our focus onto ourselves just as much. We are each our own person to serve a purpose different than anybody else. This balance of focus truly is a delicate one, as selfish as it may seem our number one priority should be ourselves. Our service to other's will come once we have truly identified who we are.

Hear me out on this one, if we aren't doing what God wants us to do and instead doing things because it looks good on others ... we are pretty much agreeing to swim upstream the rest of our life! This doesn't mean shut everyone out and focus on only you, doing what only you want, and making sure you get your way. No, God has a plan for us and we need to turn our focus on who God created us to be and allow Him to make it even better. I have worked hard not to over analyze what others are doing and instead bring it back to "well what does that look like for me" and go from there.

Life is always going to bring challenges, hardships, frustrations, and negativity but all of those are usually the result of something that is out of our control. Positivity and encouragement, on the other hand, is not. Instead of allowing these uncontrollable circumstances stop you from succeeding, turn your focus onto something else (maybe even yourself) and see what God has in store. In might only be a pinch to start with but sometimes that's all we need.


Tuesday, May 26, 2015

Homemade Vanilla

How to Make Your Own Vanilla

I have been wanting to start my vanilla since day one and finally took the first step of purchasing 1/4 pound of grade B vanilla beans today from Amazon! Will Cook for Friends has a great explanation about how to do this and what kind of beans and vodka to use. This is really going to take some patience because the product is not usable a couple months and  you could let it sit for up to 12 months! WHAT?!? This is definitely the reason for my procrastination which is quite a silly reasoning since had I started this on day one of my blog it would be within a few weeks of trying it. Oh well, such is life :)

Here's the plan ... as soon as my beans arrive

from Amazon

Homemade Vanilla

8-10 vanilla beans
8 ounces of vodka

Split beans and remove seeds. Place beans and seeds in glass jar. Pour vodka over beans. Close tightly and shake. Allow to sit in a dark place for 4-6 months, shaking occasionally. Anytime after 6 months, strain vanilla from beans and store in a dark, tightly sealed bottle.

Nothing very exciting today but it's one more step closer to going homemade! 

Monday, May 25, 2015

Homemade Pudding

How to Make Your Pudding From Scratch

Well it hasn't been a sit-on-the-couch-and-do-nothing kind of day but is has been a relaxing Memorial Day after a very busy weekend. I will admit I almost decided not to post anything just out of pure exhaustion and needing a break, but I know myself well enough ... one day could turn into two or more and it will then no longer be a "perfect" challenge and which could give way to an end to a very good thing! 

I am always making something everyday but right now my focus has been on cutting down on my grocery list by replacing things I would normally buy with a homemade version. Homemade pudding was a first for me and although I made this last Friday for my momma bear's birthday cake, I am usually trying something new each day. Today I did try my hand at potato salad for the first time because the Mr. absolutely loved some German potato salad my sister made on Saturday and wondered "Why have we never eaten this?!?! It is SO good!" You see, the Mr. has always turned his nose up at potato salad so I just never attempted it myself and never wasted our money on it. So today I decided I would make some of this German potato salad for him and then realized it called for cornstarch which I am out of. Now if cornstarch was something I could make at home ... you better believe that would have been my post for today! :)

Instead, I tried a new recipe for a bacon potato salad. Through this we discovered the Mr. really doesn't like potato salad, just German potato salad! I even agreed the recipe was a "tweak-er not a keeper" but the real problem for the Mr. is the texture and cold potatoes. I will just stick with the German potato salad as soon as I get to the store for some cornstarch. Since I wasn't overly thrilled with the outcome on today's potato salad attempt, I decided I would try some homemade chocolate pudding and share both a vanilla and chocolate recipe, but guess what all the recipes called for? Yeap, cornstarch! So that'll have to be an update! I tweaked Lynn's Kitchen Adventures' recipe. 

Homemade Vanilla Pudding

1 1/8 cup sugar
6 tablespoons cornstarch
1/4 teaspoon salt
1 cup cream
3 3/4 cups milk
5 egg yolks
1 1/2 tablespoon butter
1 1/2 tablespoon vanilla

Combine sugar, salt, and cornstarch in a saucepan. Whisk in cream, milk, and egg yolks. Cook over medium-high heat, stirring continually for 3-5 minutes until thickened. Remove from heat. Stir in vanilla and butter. Whisk until butter is melted. Transfer to a bowl. Cover with plastic wrap making sure to allow for the plastic wrap to touch the pudding to prevent a film from forming. Enjoy. Refrigerate any unused servings.

Momma Bear & Pappy with the cakes
Layered Cream Puff Dessert Cake & Ella Scharlach Cake

In closing for today, I would like to thank all of the family members who have lost their loved ones while they were serving in our country's armed forces. It's because of your selflessness and support they were able to serve and protect their's and our country! I am thankful for those who serve currently or have served in the past. God Bless You All for you courage!

Today's Question: Vanilla or Chocolate?

Saturday, May 23, 2015

THE Ella Scharlach Cake

THE Ella Scharlach Cake

BIG day today ... Class 2A Baseball Regional Champs, Momma Bear's 60th, and to end it all, a surprise birthday blessing for Pappy.


Not the greatest picture and this was made yesterday but since it was for a surprise birthday celebration today for a very special fella I didn't want to spoil the surprise! This is an old time favorite of his and I learned there is a lot of work that goes into it, but it was WAY to delish for this to be only a one time deal. So here's to more years and more Ella Scharlack Cakes Pappy. We love you very much!

Would have also shared Momma Bear's cake, but forgot to snap a pic in the mists of the chaos. Maybe one later with all 60 candles a blazing!?!?!

Onto the recipe ...

There is a neat story behind Ella and her cake. This was her specialty and she kept the recipe a secret for a very long time! I am on the hunt for more pieces to this story ... to have such a memorable dessert and EVERYBODY wanting the recipe but having to depend on the only person who makes it before they could enjoy it, completely fascinates me!

I do have one request, if you plan on making or sharing this recipe, please give credit to Ella! I never knew her personally but anyone that has a cake named after them deserves some recognition! :)

Ella Scharlach Cake - Original Recipe

4 eggs separated. Beat yolks with 1/4 cup water, gradually adding 2/3 cup sugar, 1 teaspoon vanilla, little salt - fold in 1 cup cake flour and 1 teaspoon baking powder. Last - add whites beaten stiff with 1/3 cup sugar. Bake 350 degrees in 2 layers for 15 mins.

When cool, split layers and fill with pt. cream, whipped and sweetened with 1/2 cup confectioners       sugar. 

Ice over all with 7 minute icing
7/8 cup sugar
3 T water
1 egg white 
pinch salt
1 teaspoon vanilla
Mix together in double boiler and beat over hot water 7 minutes till stiff to spread. 

2 1/2 square chocolate, 2 teaspoon salad oil melted over hot water.

Ella Scharlach Cake - Details Added

Quick-Look Ingredient List
5 eggs
2 cups sugar
water
2 teaspoons vanilla
salt
1 cup cake flour
1 teaspoon baking powder
1 pint heavy cream
2/3 cup powdered sugar
2 1/2 ounces of semi-sweet chocolate
2 teaspoons of vegetable oil

Preheat oven to 350 degrees. Prepare to 8" or 9" round cake pans by cutting wax paper to fit the bottom and lightly greasing and flouring the sides of the pans.

Step 1:
4 egg whites
1/3 cup sugar

Beat egg whites and sugar until stiff. Set aside.

Step 2:
4 egg yolks
1/4 cup water
2/3 cups sugar
1 teaspoon vanilla
pinch of salt

Beat egg yolks with water. Gradually adding sugar, vanilla and salt while continuing to beat. 

Step 3: 
1 teaspoon of baking powder
Stiff egg whites

Gently fold in cake flour and baking powder until combined. Add stiff egg whites and continue to fold in until mixed.  

Step 4: 
Pour into prepared pans and bake at 350 degrees for 15 - 20 minutes until slightly golden. Allow to cool for a few minutes in pan. Use knife around the edge of the pan to loosen the cake and remove from pan. Allow to cool completely. Then cut each cake into 2 layers.

Step 5: This can be done during baking or cooling time 
1 pint of whipping cream
1/2 cup powdered sugar

Beat cream until stiff. Gradually add powdered sugar. Refrigerate until ready to use

Step 6: 
Layer cake using the prepared whipped topping between each layer. 

Step 7: 7 minute icing, double boiler or sauce pan and glass or stainless steel bowl needed
7/8 cup sugar
3 tablespoons water
1 egg white 
pinch salt
1 teaspoon vanilla

Prepare your double boiler (or sauce pan and stainless steel bowl) by placing about 1 inch of water in the bottom (saucepan) of the double boiler. Bring to boil. Place all the ingredients in the top (glass or stainless steel bowl) of the double boiler. Reduce heat to medium and beat (hand mixer is preferred ... trust me) for 7 minutes straight until stiff to spread. Use immediately to ice layered cake.

Step 8: Double boiler needed again
2 1/2 squares of semi-sweet chocolate (scant 1/3 cup of chips)
2 teaspoons of vegetable oil

Repeat double boiler process from step 7. Melt over hot water. Spread over top of cake and let drizzle down the sides. 

Refrigerate and ENJOY. 

A labor of love for sure BUT well worth it! Grandma Em always sliced her Ella Scharlach cake very thin ... probably to savor it as well as maximize the servings!

I'd love to hear your stories and memories if you grew up eating Ella Scharlach Cake. 

Friday, May 22, 2015

Homemade Wine Vinegar

Do sure exactly what I am doing here but I am following what I discovered from Jen's Natural Kitchen. I just ran out of my red wine vinegar AND had a leftover bottle of red wine in the fridge from Christmas. I am sure you are wondering why in the world do you EVER have leftover wine?!?!?! That my friend is a very good question ;)


I had some leftover white wine also (I know, double downer!) so since this is a longer process I figured I better get started on that one too! Now we just wait. On a little side note be sure to cover the jars with cloth and then remember it is just cloth, cloth does not hold liquid very well ... OOPS!

Updated 9/12/15 - So this one was a flop. :( Not because it wouldn't work but because I didn't do a great job following up and take the additional steps! The red wine molded and I am a little embarrassed to say the white wine is still in my cupboard. I couldn't even tell you the condition that it is in right now, YIKES! It might be a great science experiment I could use this the kids at this point! :)

This is one of those things I would like to do successfully at some point since we use both very regularly, but until then I will suffer the guilt every time I purchase it knowing fully well I could make it AND for a fraction of the cost! ;-p

Thursday, May 21, 2015

Homemade Specialty Flours

Today's another busy day, but no complaints from here! As I was driving to work this morning, I was wondering if there was some time I could borrow from somebody else's day ... if only it worked that way. I then was suddenly humbled by the idea of borrowed time, in reality we are all are using borrowed time. On Tuesday of this week, the young man I mentioned in my May 9th post, lost his fight to ALS at the young age of 34, leaving behind his wife and 6-year old daughter. He surpassed his five year diagnosis anniversary but only by a few months. Our prayers go out to his family during their loss. No moment is guaranteed. I often struggle to find the balance in this - should I slowdown and enjoy life OR make the most of every moment? No matter how busy or slow life may be, I always try to keep my faith on and remember God is in control, I just need to do my part and listen to his directions.

For today's post, I once again ran into an ingredient I needed and didn't have in my cupboard!

Transforming Your All-Purpose Flour into Some More

I will never again let the need for one of these ingredients stop me from trying a recipe. I am prepping for a busy cake weekend and making a first attempt at an old recipe which called for cake flour. A while back I needed self-rising flour and figured out I could make my own (see recipe below), so I decided to start by seeing if I could make cake flour instead running to the store. Sure enough, along with bread flour and pastry flour which I will have to try also at some point ... in all reality I would get a thrill out of being the little red hen and doing it all from scratch (sometimes I wonder if I was born into the right era)!


Homemade Cake Flour

1 cup minus 2 tablespoons of all-purpose flour
2 tablespoons of cornstarch

Combine ingredients. Sift together (A mesh strainer or sieve works great). Store in an airtight container. 

Homemade Self-Rising Flour 

1 cup all-purpose flour
1 1/2 teaspoon of baking powder
1/4 teaspoon of salt

Combine ingredients. Sift together. Store in an airtight container. 

I will need to try out pastry flour and bread flour sometime!


Wednesday, May 20, 2015

Homemade Chocolate Sauce

Please don't judge, but yes I just got done making homemade chocolate sauce and you better believe I will be indulging in it at 10:30pm! Priorities people! ;) We have a Mt. Everest of STUFF that was in the car from the baseball game that didn't make it more than 10 feet inside our front door (really not sure how we fit in the car sometimes), the dishes haven't been done since yesterday morning, and don't get me started on everything that has managed to find a resting place on the kitchen counter! Today was jam-packed but very productive, we left at 7:30 this morning for school and work, then had to run straight to town after picking up #3 and #4 about noon to grab a few things for our family get together on Saturday (my momma bear is turning 6 ... 0!), but then needed to be back by 3:15 to grab #1 from school, and then onto #2's baseball practice early so we could head to the Mr.'s regional baseball game that was delayed an hour and then took almost 3 hours to play (which they came out on top, another very good reason to indulge in some chocolate so late in the evening), with a 45 minute drive the kiddos and I finally made it home about 9:30 this evening, whew!

My life (and kiddos, hehee) is crazy, stressful, overwhelming, frustrating, and completely blessed! At the end of the day we have clothes on our backs, a house to come home to, food in our bellies and love abounding. I thank God because there really isn't much more I could ask for.

In just a few moments I will be pausing to enjoy all of these blessings and a little bit of chocolate. I started with David Lebovitz's recipe and then just kinda flew with it! I had unsweetened chocolate needing some attention so decided to use it up.


Homemade Chocolate

1 1/2 water
2/3 cup sugar
2/3 cup brown sugar
1/4 cup of corn sugar (optional)
6 oz of unsweetened chocolate

Roughly chop chocolate. Place water, sugar, and corn syrup in a sauce pan and bring to a boil. Boil for 2-3 minutes. Remove from heat and add chocolate. Stir until melted. Use a mixer to blend chocolate sauce as is cools. Sauce will thicken as it cools. Store in airtight container in the refrigerator.

This didn't turn out like the sauce I would image putting on top of ice cream, but it worked just fine in milk so the kids will be thrilled!

Today's Question: What is your favorite late night indulgent? 

Updated 5/21/15 - In no way was this a picture of perfection, this morning our homemade chocolate sauce wasn't so much of a sauce but instead a paste, oops! It is still usable to make chocolate milk which we had for lunch today. The favor was just as good as the Hershey chocolate syrup, but it didn't dissolve like I felt it should. I will continue to work on this one but in no way will this chocolate "sauce" go to waste!

Tuesday, May 19, 2015

Homemade BBQ Sauce

How to Make Your Own BBQ Sauce

A summertime staple now that the grilling has bung, BBQ sauce is one of those things once you find one you really like it's hard to find anything else that compares or it could take years even if you did! We use a variety of sauces from Open Pit, Baby Ray's, Country Bob's, Buffalo Wild Wings, and to save some of the best for last Rub N Chug original and cinnamon apple! If you live in the area and have never tried this, you need too! Due to the fact we get treated every once in a while with some homemade Rub N Chug BBQ sauces I have left it up to the pro since I know mine wouldn't even compare. 

Today I tried my hand at some homemade Jack Daniel's BBQ sauce, my inspiration was the pork loin that is in our smoker and TGIFriday's (is it really only Tuesday?). We don't normally get that fancy with our meals but when we find meat for $1.78 a pound and it's good stuff; we grab is and run with it! I purchased a whole pork loin for under and cut it into 4 meals ... two roasts and two meals worth of pork loin chops! Don't forget we are feeding a family of 6, two of these meals are in the freezer and each one has enough for lunch leftovers.

Now some of you might be thinking ... we sure don't have any Jack Daniel's on hand! No worries, try something else, your favorite wine, favorite seasonal beer, or even a Coke, I really don't think it would matter ... it's all about what flavors work for you. I couldn't tell you how long the bottle I used today has been sitting in our cupboard but when I starting thinking about making BBQ and TGIFriday's Jack Daniel's menu (I'm salivating as I type) came to mind, it was a no brainer! I started with a recipe from The Ultimate BBQ Sauce Recipes and just tweaked it with what I had on hand.


Homemade Jack Daniel's BBQ

3/4 cup Jack Daniels Whiskey (optional, substitute with water)
1 teaspoon of onion powder
4 cloves of garlic, finely chopped
1/3 cup of vinegar
3 tablespoons of Worchestershire sauce
1/2 cup packed brown sugar
1/2 cup tomato paste
1/2 teaspoon of hot pepper sauce

Whisk together ingredients in sauce pan. Bring boil over medium heat. Reduce heat and simmer for 30 minutes. 

This has been simmering for about 15 minutes and it smells and tastes DELISH! I love when recipes come together without having to leave your home to purchase additional ingredients.


Monday, May 18, 2015

Homemade Baking Powder

How to Make Your Own Baking Powder

If you have ever made snicker-doodles (these are a favorite of ours) or play-dough (I need to add this to my to do list), then I am sure you have the needed ingredient for baking powder ... cream of tartar which is the powdered form of tartaric acid (an organic acid found in plants). 


Homemade Baking Powder

2 parts cream of tartar
1 part baking soda
1 part cornstarch (optional)

Place all ingredients in and whisk until combined. Store in an air-tight container. 

Easy-Peasy! I made my first batch of homemade baking powder a few months ago and am just now running low.  Since I have just recycled an old baking powder container (8.1 oz), the amounts of 1/2 cup of cream of tartar and 1/4 cup of baking soda and 1/4 cup of cornstarch would about fill it perfectly. The only change I have noticed while using homemade baking powder is in how our pancakes will rise while cooking, but no noticeable change in taste. I have also used it in all of my other baking and have seen no major difference as well! 

Cost Comparison: without doing the math (I'm off duty right now, heehee) I'd have to say homemade and store bought are very comparable in price

If you are need of a little science/chemistry lesson check out this link! Great explanation of the need for an acid (cream of tartar) and base (baking soda) to create a foaming action that is known as our leavening (or raising) agent in our baking!

Saturday, May 16, 2015

Homemade Ant Bait

How to Make Your Own Ant Bait Stations

It's that time of year when the ants are out in armies and it breaks my heart to know I am poisoning worker ants and then they are carrying it back to their colony to kill and destroy it ... extreme thinking I know but just so sad! Which is why I try not to think that deeply each time I place a cotton ball out once I have spotted an ant colony feeding on that one very minuscule crumb that one of the kiddos dropped who knows when. 

I have been using this method for some time and I now keep a jar under my kitchen sink (child locked of course!) with the cotton balls soaking in the solution so all I have to do is pull one out when I need it. It only takes about a day, maybe two, when I notice no more ants traveling back and forth. Usually I will try to follow their trail to the source of entry into our home which is quite easy if I just sit and watch without disrupting their for orderly path!

Homemade Ant Bait

1/4 cup warm water
1/4 cup sugar
1 tablespoon of Borax

Mix all ingredients together until sugar and Borax are dissolved. Add 6-8 cotton balls to the solution. Stir until cotton balls are saturated. Store in a closed container out of the reach of children (just to be safe).

ant bait station after 15 minutes of setting out

Friday, May 15, 2015

Homemade Ketchup

I feel like I am approaching the end of my kitchen series with only a few things I'd still like to try! I am hoping once school is out for the summer I can get back to the drawing board and come up with a plan for the next series ... thinking a "Body and Beauty" series??? Just to get your wheels a turning for some upcoming posts! :) Now onto the real reason for today's post, ketchup.


How to Make Your Own Ketchup

The Mr. isn't too particular when it comes to specific brands he has too have for his food (which I am thankful of), but he does make requests when it comes to his coffee and ketchup! I really think I can tweak what I have here to get pretty close, but until then I will continue to buy his Heinz and the kids can be the guinea pigs until I have perfected it :). 

My recipe was inspired by Simply Scratch and Hillbilly Housewife. I feel the cinnamon is a little too much and will cut it out next time with a few more changes like using white sugar instead of brown and regular vinegar instead of white wine vinegar.

Homemade Ketchup

6 ounces of tomato paste
1/2 cup brown sugar
1/4 teaspoon dry ground mustard
1/4 teaspoon of salt
pinch of cinnamon
pinch of cayenne
dash of ground cloves
dash of ground allspice
1/3 cup of water 
4 tablespoons of white wine vinegar
1 tablespoon of white vinegar

Combine all ingredients and whisk thoroughly. Store in airtight container and refrigerate. 


The consistency it slightly different, but the true taste test will come tomorrow when all the flavors have had some time to get to know one another!

Cost Comparison: ~$0.70 for 10 ounces of homemade ketchup vs. $3.50 for 38 ounces of Heinz
                                ~$0.07 per ounce of homemade VS. $0.09 per ounce if Heinz

Thursday, May 14, 2015

Homemade Caramel Sauce

Aaaahhhh! We are running behind! Let's just say it was good :)


Heehee! I will share more later but we are out the door to another baseball game and most of my afternoon went into baking and making the Mr.'s cake for his 35th Birthday!!!! Love him so much! Some of this caramel sauce went into his cake, can't wait to eat it later (pictures to come, but for now it's a surprise)!

Happy Birthday Babe and GO SPARTANS!

Updated 5/18/15 - 

Here is the recipe for the caramel sauce I used. It was adapted from Averie Cooks

Homemade Caramel Sauce

1 cup sugar
1/4 cup water
1 teaspoon of corn syrup
1/2 cup heavy cream

Add sugar and water to sauce pan and bring to a boil over high heat. Stir carefully to minimize sugar mixture on the sides of the pan. Add 1 teaspoon of corn syrup. Continue to boil and stir occasionally slowly for 3 to 5 minutes. As soon as you start seeing the color changing from clear to caramel, watch very carefully. Once it turns to the beautiful color of caramel remove from heat (be careful it can go from perfection to ruined in seconds). Gradually and carefully add the heavy cream. Return to low heat and stir until smooth.

I made this twice ... first time was a fail because I didn't watch it carefully enough (do not make or take any phone calls during this time!)  ... the second time was better but I forgot the corn syrup! Oh well, that's part of this process ... learning as I go! The first attempt was a perfect, ooie-gooey caramel, but had that bitter burnt sugar taste. :-p The second went onto the cake just fine and tasted GREAT but crystallized as it cooled so was more of a solid and not ooie-gooey by the time we were able to eat it about 4 hours later.

the Mr.'s turtle-inspired cake


Wednesday, May 13, 2015

Homemade Yogurt

How to Make Homemade Yogurt

So excited to say the least! Not only are we making yogurt today for a fraction of the cost of store bought yogurt but we get to hangout with my big sis and her 3 kids!!! Over the past 6 years, my sister and her family have been back and forth between the states and East Central Asia on missions, so when they are home it's a HUGE blessing! 

She is my yogurt mentor :) and as been making yogurt for quite a while. I have heard of using a crock-pot, a cooler, or an oven as a way to maintain the temperature of the milk while it is thickening. She uses a Yogotherm Yogurt Incubator and has found this to be one of the only ways she has found success repeatedly. She has friends that use some of these other methods and have had great results, so really it just comes down to finding a method that works for you. I would love to try some of these other methods just to compare!

Homemade Yogurt ... the final product! YUM!

Homemade Yogurt

2 quarts of milk (skim, 2% or whole)
2 tablespoons of yogurt
Yogotherm (optional, but what we used ... very handy!)
food thermometer (needs to measure 110 - 185 degrees)

Heat milk in saucepan to 185 degrees over high heat (~15 minutes). Fill sink up halfway with cold water, you will use this to cool the milk down. Remove pan from stove and place in sink with cold water. Whisk and cool to 110 degrees (5-10 minutes). Once cool add 2 tablespoons of yogurt and whisk thoroughly. Pour into Yogotherm and close securely. Incubate on counter in Yogotherm for 8 - 24 hours (the long the incubation period the tarter the flavor). Remove from Yogotherm and whisk until smooth.

For a Thicker Yogurt
colander
bowl
cheesecloth (paper towel or coffee filter)

After incubation period, line colander with coffee filter and place over bowl. Pour yogurt into lined colander and strain in the refrigerator until desired consistency (3-4 hours). They whisk until smooth. No worries if you forget and strain for longer you can always add some whey back in while whisking.


milk heated to 185 degrees


milk cooled to 110 degrees in cold water bath
yogurt after overnight incubation
straining for a thicker yogurt
... after straining for 5 hours 
I loved the way she informed me there really has been no way you can screw this up, this very reassuring!

Updated 5/14/2015 - The process really was very simple and only required a total of 30 minutes of active participation. The Yogotherm sat on the counter overnight and I made sure to have the colander ready to go for the morning. During the scramble to get out of the house, I poured the yogurt into the lined colander and made room for it in the refrigerator, knowing we could try out the yogurt with our lunch when we arrived home today was well-anticipated! We were not disappointed one bit!

Cost Comparison: $0.80 for 32 oz of homemade yogurt VS. $1.89 for 32 oz store bought
A half a gallon makes 32 oz of yogurt, so really it comes down to how much you spend on your milk!

Updated 5/17/15 - Needless to say but the yogurt is gone as of Friday (lasted us 2 days!), we can dominate a 32 oz yogurt in one setting! After talking with my sister about the longevity of homemade yogurt she felt it would last at least a week and probably longer ... her family consumes it fast enough she has never had it go bad.  

Today's Question: What is your favorite yogurt flavor? 


Tuesday, May 12, 2015

Homemade Raspberry Lemonade

Now I really need that lemon tree! Decided today I needed a little change in pace and decided to go with something fun instead of the monotonous items used regularly in our kitchen.

I typically send drink pouches with the kids lunch and this morning I realized my stash was out. Bummer! I am sure they were thrilled to find some good ole H2O when they opened their lunches. :) Since today was a no game day for anybody (SHOCKING!), we could afford messing with our afternoon nap schedule and run to town for a few errands. Also, the Mr.'s 35th birthday is on Thursday and I have a surprise cake flavor in the works I needed to grab additional ingredients along with my growing list of things needed from that side of town.

While running through the store I was trying to come up with an idea for a fun drink I could send with the kids lunches the remaining of the year instead of grabbing another box of drink pouches. This was when I saw the bottle of lemon juice (which we are out of also) and decided why not some homemade lemonade! I would much rather use fresh lemons but this will be a close second. It wasn't until I reached the produce and the raspberries were calling out with a beckon of light shining down on them ... at this point it was obvious these two belonged together today!


Homemade Raspberry Lemonade

12 cups of water
2 cup lemon juice (approximately 11 lemons if you wanted to do fresh squeezed)
2 cups of sugar
raspberries

Mix water, lemon juice, and sugar in a one gallon pitcher. Drop a couple raspberries in the bottom of a glass and smash mojito-style. Add crushed ice. Top with homemade lemonade. Enjoy!

Today's Question: What is your favorite summertime drink?


Monday, May 11, 2015

Homemade Mayo

How to Make Your Own Mayo

Oh mayo, the day has finally come ... I just wish you tasted better! ;-p I followed The Clothes Make the Girl's Blog and it was very simple! However, Aldi olive oil must not be light tasting enough ... I don't mind olive oil but it's not the only thing I want to taste in my mayo. I would love to try this with avocado oil and a little more salt.


Homemade Mayo

2 tablespoons of lemon juice
1/2 teaspoon of ground mustard
1/2 teaspoon of salt
1 and 1/4 cup of olive oil (will be trying avocado next)

Place egg and lemon juice in processor and allow to reach room temperature (about 1 hour). Add 1/4 cup of olive oil and blend for 30 seconds. Slowly drizzle remaining 1 cup of olive oil into food processor while running, this should take a couple minutes if you are truly drizzling :). Once all the the olive oil is incorporated you will have a thick and creamy mayo.

We don't use mayo by itself too often, so I am very curious how this will taste in our homemade ranch dressing (bummer I should have waiting on making a batch last week ... poor planning on my part!), spicy mayo, homemade coleslaw, and chipped beef spread. 

Today's Question: What is your favorite use for mayo?

Updated 5/17/15 - We used our homemade mayo in a family favorite recipe for chipped beef spread and it turned out great! No olive oil taste whatsoever. I did notice it was not as creamy as it usually is, but I didn't warm my cream cheese up before starting and I did use a little more beef; both could have been the culprit for the less creaminess so I won't blame the homemade mayo yet!

Sunday, May 10, 2015

A Bowlful of Motherhood

No there was nothing being made from scratch today, we had more important things to do. :) The kiddos are down early after a full weekend of plans and a week ready to start whether we want it to or not. So, I am finally finding time to sit down and get a post in that didn't take time away from what today was all about! This of course is happening between a few re-directions to the kiddos to go to sleep ... I would love to be in bed if I were them and I love them dearly, but please just go to sleep! ;)


A Tribute to a Village on Mother's Day


We all have a mother, here or gone, near or far, born from or adopted, lost or found, someone who has made a difference, loved us when we least deserved it, cared for us when no one else did, and the list goes on and on! I have found this last week before Mother's Day being Teacher Appreciation Week and with Father's Day right around the corner to be very fitting with how own lives are established. A mother's role is only one of the crucial parts for children to become who God intended them to be and I appreciate a day set aside to honor the role that a mother devotes her time to doing. However, as a mother of 4, Mother's Day reminds me that there is no way in a million years I could do this job (you know it's a full-time one and the job description changes without warning) on my own! On tough days I will remind myself, "Grandma had 12 children" and "Mom was a single parent for many years" which then leads me to "LET'S GO, I CAN DO THIS! There's no turning back and no giving up!" 

My grandma and my mother have both been indisputable pillars of strength and God-loving examples of the Proverbs 31 woman! Yes, we all have our shortcomings, our insecurities, circumstances we'd wish were different, and things we would change if given a second chance; but when it is all said and done it's all about who is seen in us through our child's eyes. It's this image that will last a lifetime and be the rock of who they will become! Thanking God for the examples He has placed in my life.

When one stops and takes notice of all the examples that have molded them into who they are, it's hard not to remember the phrase "it takes a village to raise a child"! I have thought of this quote often and firmly believe in the value each person we come in contact has on our life. It is for this reason I would also like to thank all of the women that are 'moms' to our children at any given time, on any given day, knowingly or unknowingly, you are making a difference!

Happy Mother's Day!


Saturday, May 9, 2015

Homemade Pizza Dough

How to Make Your Own Pizza Dough

Sorry so late and so short and sorry it's not mayo ... we've had an very eventful day of baseball games and raising awareness for ALS, also known as Lou Gehrig's Disease. A college baseball teammate of the Mr.'s was diagnosed with ALS five years ago at the young age of 29, you can see his story here. A very touching story and makes you stop and realize every moment is a blessing!

Mayo had to be pushed to the side and I decided to use what was for dinner as today's post. My sister has been using this recipe for years and as tweaked it to make most of her doughy items ... including cinnamon rolls that don't take four plus hours! I will share the source once I find out what it is, my recipe is coming straight from a picture I received via text coming from halfway around the world from my sister (oh the wonders of technology!).


Homemade Pizza Dough

.
I will add more tomorrow.
:) 
Updated 8/16/2015:
2 1/2 to 3 cups flour
1 package active dry yeast (2 1/4 teaspoon)
1/2 teaspoon salt
1 cup warm water
2 tablespoons vegetable oil
cornmeal 

Combine 1 1/4 cup flour, the yeast, and salt. Add warm water and oil. Beat on low for 30 seconds. Scrap down sides. Beat on high for 3 minutes. Stir in 1 1/4 more cups of flour. Pour the remaining 1/2 cup flour on a clean counter top. Turn out dough onto a floured surface. Knead for 6-8 minutes or until smooth. Let rest for at least 15 minutes. Sprinkle pizza pan with cornmeal. Shape crust and place it on prepared pan. Bake at 400 degrees for 20 minutes. Makes one 16" thick crust or 2 thin crust. 
We usually will bake it for 10 minutes on the pan and then slide it off and bake it directly on the oven rack for the last ten minutes, we like our crust crispy! We also almost always double this recipe so we for sure have some leftovers! 
To make our pizza making dinners even simpler, I created a pizza sauce mix that has come in very handy!

Updated 9/17/16:
A Pizza Bar makes for a great and fun dinner option! 

. pepperoni . italian sausage . kielbasa sausage . green peppers . jalapenos .
. pineapple . tomatoes . black olives . mushrooms . mozzarella . pepperjack . 

All together this makes for everyone getting a pizza to themselves exactly how they like it and to make it even better it's a great way to use up those small amounts of fresh ingredients that might be hanging out in your fridge. Win - Win. 

Friday, May 8, 2015

Pasteurizing Eggs

How to Pasteurize Your Own Eggs

The first step to making our own mayonnaise! Now all we need are those chicks #4 wants to go back to the store for so we can have farm fresh eggs ... one day this may be a reality, for now the Mr. isn't sold on this idea!

To pasteurize our eggs I followed Baking Bites instructions. 


Pasteurizing Eggs

eggs
sauce pan
water
food thermometer (digital works best)

Put desired amount of eggs in sauce pan and fill half way with water. Place sauce pan over medium heat with thermometer in place. Watch carefully. Bring water temperature to 140 degrees (see note) and keep the temperature consistent for 3 minutes by adjusting heat or removing from burner. After 3 minutes remove from hot water and immediately cool under running water. Use or refrigerate. 

Note: Eggs start to cook at 145 degrees so it is important not to go above 142 degrees. If you are concerned about your water getting too hot you could lower the temperature but would then need to cook it for longer. I remember reading (will have to find again and link) you could pasteurize eggs at 130 to 140 degrees for 5 to 45 minutes. I did crack one egg open to see how it looked after the process was complete!

egg after pasteurization

I will be using these tomorrow!!! Be sure to check back on our homemade mayonnaise. :)

Today's Question: Have you ever purchased pasteurized eggs? 

Thursday, May 7, 2015

Homemade Ricotta Cheese

How to Make Homemade Ricotta Cheese

Lasagna here we come! In the past few times of making lasagna I have finally tweaked it to where the fam is asking for more ... our secret is Italian Sausage. We use the Italian sausage links from Aldi and remove the casing and then fry it up like hamburger (also used this sausage on some homemade pizza and calzones this week, very tasty!). 

With most main courses, I tally up the total cost as I toss the ingredients into the grocery cart. My max dollar I like to spend is $10 per dinner which for a family of six seems fairly reasonable. If I can do it for closer to $5, you better believe I am all over it and we will be eating it a more often! If I am spending $10 every dinner for 30 meals a month that's $300 just on dinners ... don't know about you but we like to eat 3 meals a day and dinner out occasionally so it makes me feel accomplished to save even just $1 per meal. Over the course of a month this adds up to an extra night of carry out which means I get the night off (SWEET!). Lasagna usually runs us about $4 for meat, $2 to 4 for ricotta, $2 to 4 for mozzarella (depending on my cheesy mood), and $2 for noodles. So $10 to $14 before any sides, needless to say due to cost this is not a go to meal on a regular basis.

Lasagna, you don't stand a chance! It's all about cutting the cost this week ... homemade noodles, homemade ricotta, AND will be using homemade bread for our garlic bread! I used a combination of a few recipes from Ina Garten, The Italian Dish, and Food for My Family.


Homemade Ricotta Cheese

8 cups of whole milk
1 cup heavy cream
1/2 teaspoon of salt
2 tablespoons of lemon juice
2 tablespoons of white wine vinegar
colander 
cheese cloth (or coffee filters)

~ I started with the lemon juice and it didn't curdle so I added the white wine vinegar, and poof CURDS. I will be trying this next time with just regular vinegar, so be sure to check back for an update on the recipe and instructions!~


Moisten cheese cloth (I used coffee filters thanks to my brilliant sister's idea!) and line colander(s). Put milk, cream and salt in stockpot and bring to a boil (about 190 degrees) over medium heat, stirring occasionally so the milk does not burn. Stir in lemon juice and turn heat to low and simmered for a few minutes. Remove from heat and stir in vinegar until curds form. Pour curds into lined colander to strain off the whey (you can repeat this process a couple of times if your colander is not large enough). Allow time to strain to your desired dryness. Overnight in the refrigerator works great.  Store in airtight container in refrigerator for 2-3 days. 

we are just 'whey'ting here ;-)!
Cost Comparison: ~$1.25 for 15 oz. of homemade ricotta VS. ~$2 for 15 oz store bought

Today's Question: Do you use ricotta or cottage cheese in your lasagna?

Updated 5/17/15: We used the homemade ricotta cheese in some lasagna this week ... SO GOOD! I really wanted to try a new noodle recipe also but time didn't allow for fresh noodles but I can only imagine how good this would have been with those also. All I have to say is, I am never buy ricotta cheese again and I am forever a homemade ricotta cheese convert! So easy and so cheap AND it lasted in my fridge for about 4-5 days before I was able to use it which is an added bonus!

Updated 6/14/15: We made ricotta cheese again but this time I used 2 tablespoons of just white vinegar. Next time I will try it with 4 tablespoons because the curds were smaller and the whey wasn't as clear this time. Still tastes amazing and I was reminded just how simple the process was! 


Wednesday, May 6, 2015

Homemade Soy Sauce

How to Make Your Own Soy Sauce

Soy sauce is one of the ingredients I have made a special trip to the grocery store on more than one occasion because we are out not because we use it all the time but because there's only one or two recipes we use it for and I forget to put it on my list when I use it all up (argh!). We were not out of soy sauce but we are getting ready to make one of our main dish's that uses soy sauce and decided what better time to try out some homemade soy sauce (plus I can really compare the flavor then). 

I found a useful site (www.misshomemade.com) that gave a traditional soy sauce recipe, a vegan soy sauce recipe and quite a few other sauces, definitely need to look into those more! I am using the traditional recipe because I have sesame oil and not balsamic vinegar, odd I know ... can't even remember what recipe I bought the sesame oil for in the first place (one more reason why I need to document all my findings in this blog!). Again I am all about using what is in the cupboard and avoiding a trip to the store.


Homemade Soy Sauce

1 and half cups of boiling water
10 bouillon cubes
4 tablespoons of cider vinegar (balsamic would work also)
1 tablespoons of molasses
1 teaspoon of sesame seed oil
pinch of white pepper (black pepper is fine ... bought some white pepper the other day and want to try it)

Possible Additional Costs: ~$5 for sesame seed oil, ~$2.60 for beef bouillon ... both I had on hand
Cost Comparison: ~$0.11 per ounce for homemade vs. ~$0.17 per ounce for generic store bought
Taste Comparison: It's all about preference: was this bad, no; will I use this regularly for soy sauce, probably not; will I try different recipes, yes.

We use soy sauce as the base in a marinade for chicken, sausage, pineapple kabobs from Taste of Home, SO GOOD and always a favorite! 

Today's Question: How often do you use soy sauce? Recipes to share?

Tuesday, May 5, 2015

Homemade Noodles

How to Make Homemade Noodles


Oh my gracious, there are an overwhelming amount of homemade noodle recipes ... I mean there's not much to pasta and I am sure any variation would taste delish, but for some one who likes to pick the best one the first time, YIKES! 

I decided to try The Pioneer Woman's Homemade Pasta recipe, not only because she's the Pioneer Woman of course, but because it included only two ingredients, eggs and flour! Since I am all about minimizing grocery list items, the less I have to remember the better. This is definitely something I can do without having to follow a recipe, thanks Pioneer Woman for sharing ... I am inspired to say the least!


Homemade Noodles

1 cup flour
2 eggs
water
salt

Put flour in bowl. Make well in flour. Add eggs to well. Use hands to mix until combined. Turn out onto floured counter top. Continue to mix until smooth and not sticky. Let rest while you prepare your water. Fill sauce pan with water that has been seasoned with salt and bring to boil. While waiting on water to boil roll noodles out to your desired thickness and cut into long skinny strips. Place in boiling water and cook for 2 minutes. Remove, drain, and enjoy immediately. 2 servings. 

I found it pretty easy to use a pizza cutter going back and forth to cut the noodles, they are not perfect by any means but for a first attempt it'll do just fine! Because I wanted to use these in my chicken soup, I cooked them straight in my chicken broth instead of the salt water. While we were waiting we gathered around and grabbed the bowls! YUM! Now that I have noodling making under my belt (hehe, yeah right!) I am looking forward trying a few more recipes to compare!


Today's Question: Do you have a favorite noodle recipe? I'd love to try it out!

Monday, May 4, 2015

Homemade Chicken Broth

How to Make Homemade Chicken Broth

I was recently asked if I had ever cooked a whole chicken and up until just a few days ago the answer to that was nope! Even though I grew up on chicken wings and thighs, we have typically been a boneless, skinless, chicken breast kind of family and this is about to change! The recently posed question got me thinking about why I had never attempted this and then when I saw our local grocery store (which always has a great selection of meat) I was sold!

This may get lengthy but I wanted all of this information in one place for next time! I bought a whole fryer chicken for $6.48 (really wish I remembered exactly how many pounds this was ... if I had to guess I'd say about 4).  We are lucky enough to have a smoker, but you could very easily cook your chicken on the grill or in the oven. Using a brine isn't a must but you will not be disappointment if you take the time to do this, SO MOIST & JUICY!

Brine for Whole Chicken - borrowed from Extraordinary BBQ
1 gallon baggie
2 quarts water 
1/4 cup salt
1/2 cup brown sugar

Rinse whole chicken and place in baggie. Pour remaining ingredients into back. Give it a swoosh and refrigerate over night.

Whole Chicken in the Smoker
1 - 3 to 5 pound whole chicken, brined, drained. and ready
6 tablespoons of butter, softened
1 teaspoon of rosemary
1 teaspoon of thyme
1 fresh lemon, quartered
4 to 5 red potatoes

Preheat smoker on low (cooking temp should be about 250 degrees). Cut up potatoes in 1 inch cubes, place in a bowl. Add quartered lemon, 3 tablespoons of butter, 1/2 teaspoon of rosemary, and 1/2 teaspoon thyme, toss until blended. Put potato and lemon mixture into chest cavity. In a separate bowl, combine remaining butter, rosemary, and thyme to make a herb butter. Separate the skin of the chicken from the meat and spread the herb butter between them. Place in preheated smoker directly on rack with a drip pan below it.  Smoke for 4.5 to 5.5 hours or until internal temperature is 165 degrees. Remove from smoker and cover with foil.  Allow 10 to 15 minutes to rest before cutting. Enjoy!

I am still learning how to properly cut a whole chicken, so my dinner presentation wasn't the greatest, but we did enjoy this for dinner along with leftovers for lunch the next day! I stored the leftover bones and meat in a container in the fridge until I was ready to make the broth. I used Taste of Home's recipe but there are plenty to pick from and I am sure I will be tweaking this as I go.


Homemade Chicken Broth

Leftover bones and meat (about 2 pounds worth)
2 carrots, peeled and chopped
2 sticks of celery, chopped
1 red onion, quartered
2 bay leaves (optional, or add more thyme)
1/2 teaspoon of thyme
1/2 teaspoon of rosemary
8 peppercorns, whole
2 quarts of water

Combine all ingredients in a stockpot and bring to a boil. Reduce heat, cover, and simmer for 2 hours. Allow to cool and then remove bones and strain the remaining broth using cheese cloth or a colander lined with paper towel. Chill overnight. Discard bones, vegetables and seasonings. Once chilled, skim fat from top and store in the refrigerator. 

I am looking forward to using this to make some homemade chicken and noodles! Be on the look out tomorrow for the noodles. :)

Additional Cost: $0.79 for onion, we are not be fresh onion eaters so never have these on hand ... I flavor with onion powder mostly.  All the other ingredients we already had on hand.
Cost Comparison: Will let you know once I see how much this makes!

Today's Question: Do you eat soup year round or does it depend on the outside temperature?

Upated 5/5/15 - Used this with my homemade noodles today, YUM!