Wednesday, May 13, 2015

Homemade Yogurt

How to Make Homemade Yogurt

So excited to say the least! Not only are we making yogurt today for a fraction of the cost of store bought yogurt but we get to hangout with my big sis and her 3 kids!!! Over the past 6 years, my sister and her family have been back and forth between the states and East Central Asia on missions, so when they are home it's a HUGE blessing! 

She is my yogurt mentor :) and as been making yogurt for quite a while. I have heard of using a crock-pot, a cooler, or an oven as a way to maintain the temperature of the milk while it is thickening. She uses a Yogotherm Yogurt Incubator and has found this to be one of the only ways she has found success repeatedly. She has friends that use some of these other methods and have had great results, so really it just comes down to finding a method that works for you. I would love to try some of these other methods just to compare!

Homemade Yogurt ... the final product! YUM!

Homemade Yogurt

2 quarts of milk (skim, 2% or whole)
2 tablespoons of yogurt
Yogotherm (optional, but what we used ... very handy!)
food thermometer (needs to measure 110 - 185 degrees)

Heat milk in saucepan to 185 degrees over high heat (~15 minutes). Fill sink up halfway with cold water, you will use this to cool the milk down. Remove pan from stove and place in sink with cold water. Whisk and cool to 110 degrees (5-10 minutes). Once cool add 2 tablespoons of yogurt and whisk thoroughly. Pour into Yogotherm and close securely. Incubate on counter in Yogotherm for 8 - 24 hours (the long the incubation period the tarter the flavor). Remove from Yogotherm and whisk until smooth.

For a Thicker Yogurt
colander
bowl
cheesecloth (paper towel or coffee filter)

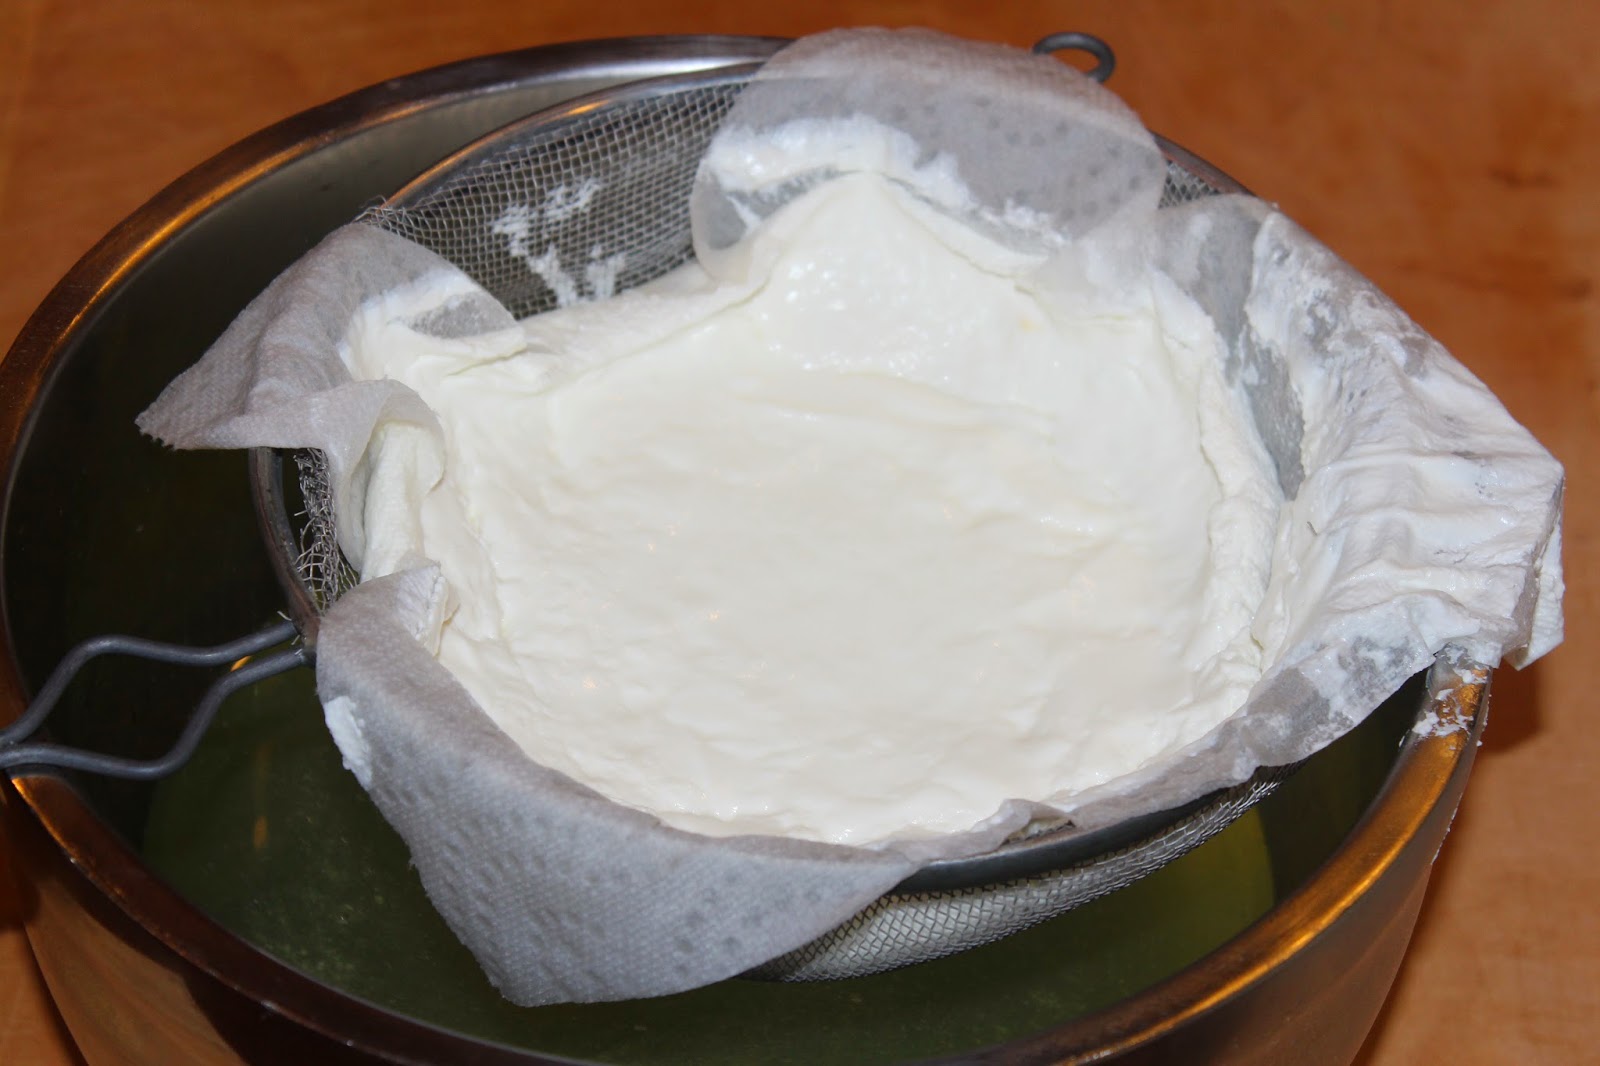
After incubation period, line colander with coffee filter and place over bowl. Pour yogurt into lined colander and strain in the refrigerator until desired consistency (3-4 hours). They whisk until smooth. No worries if you forget and strain for longer you can always add some whey back in while whisking.


milk heated to 185 degrees


milk cooled to 110 degrees in cold water bath
yogurt after overnight incubation
straining for a thicker yogurt
... after straining for 5 hours 
I loved the way she informed me there really has been no way you can screw this up, this very reassuring!

Updated 5/14/2015 - The process really was very simple and only required a total of 30 minutes of active participation. The Yogotherm sat on the counter overnight and I made sure to have the colander ready to go for the morning. During the scramble to get out of the house, I poured the yogurt into the lined colander and made room for it in the refrigerator, knowing we could try out the yogurt with our lunch when we arrived home today was well-anticipated! We were not disappointed one bit!

Cost Comparison: $0.80 for 32 oz of homemade yogurt VS. $1.89 for 32 oz store bought
A half a gallon makes 32 oz of yogurt, so really it comes down to how much you spend on your milk!

Updated 5/17/15 - Needless to say but the yogurt is gone as of Friday (lasted us 2 days!), we can dominate a 32 oz yogurt in one setting! After talking with my sister about the longevity of homemade yogurt she felt it would last at least a week and probably longer ... her family consumes it fast enough she has never had it go bad.  

Today's Question: What is your favorite yogurt flavor? 


Tuesday, May 12, 2015

Homemade Raspberry Lemonade

Now I really need that lemon tree! Decided today I needed a little change in pace and decided to go with something fun instead of the monotonous items used regularly in our kitchen.

I typically send drink pouches with the kids lunch and this morning I realized my stash was out. Bummer! I am sure they were thrilled to find some good ole H2O when they opened their lunches. :) Since today was a no game day for anybody (SHOCKING!), we could afford messing with our afternoon nap schedule and run to town for a few errands. Also, the Mr.'s 35th birthday is on Thursday and I have a surprise cake flavor in the works I needed to grab additional ingredients along with my growing list of things needed from that side of town.

While running through the store I was trying to come up with an idea for a fun drink I could send with the kids lunches the remaining of the year instead of grabbing another box of drink pouches. This was when I saw the bottle of lemon juice (which we are out of also) and decided why not some homemade lemonade! I would much rather use fresh lemons but this will be a close second. It wasn't until I reached the produce and the raspberries were calling out with a beckon of light shining down on them ... at this point it was obvious these two belonged together today!


Homemade Raspberry Lemonade

12 cups of water
2 cup lemon juice (approximately 11 lemons if you wanted to do fresh squeezed)
2 cups of sugar
raspberries

Mix water, lemon juice, and sugar in a one gallon pitcher. Drop a couple raspberries in the bottom of a glass and smash mojito-style. Add crushed ice. Top with homemade lemonade. Enjoy!

Today's Question: What is your favorite summertime drink?


Monday, May 11, 2015

Homemade Mayo

How to Make Your Own Mayo

Oh mayo, the day has finally come ... I just wish you tasted better! ;-p I followed The Clothes Make the Girl's Blog and it was very simple! However, Aldi olive oil must not be light tasting enough ... I don't mind olive oil but it's not the only thing I want to taste in my mayo. I would love to try this with avocado oil and a little more salt.


Homemade Mayo

2 tablespoons of lemon juice
1/2 teaspoon of ground mustard
1/2 teaspoon of salt
1 and 1/4 cup of olive oil (will be trying avocado next)

Place egg and lemon juice in processor and allow to reach room temperature (about 1 hour). Add 1/4 cup of olive oil and blend for 30 seconds. Slowly drizzle remaining 1 cup of olive oil into food processor while running, this should take a couple minutes if you are truly drizzling :). Once all the the olive oil is incorporated you will have a thick and creamy mayo.

We don't use mayo by itself too often, so I am very curious how this will taste in our homemade ranch dressing (bummer I should have waiting on making a batch last week ... poor planning on my part!), spicy mayo, homemade coleslaw, and chipped beef spread. 

Today's Question: What is your favorite use for mayo?

Updated 5/17/15 - We used our homemade mayo in a family favorite recipe for chipped beef spread and it turned out great! No olive oil taste whatsoever. I did notice it was not as creamy as it usually is, but I didn't warm my cream cheese up before starting and I did use a little more beef; both could have been the culprit for the less creaminess so I won't blame the homemade mayo yet!

Sunday, May 10, 2015

A Bowlful of Motherhood

No there was nothing being made from scratch today, we had more important things to do. :) The kiddos are down early after a full weekend of plans and a week ready to start whether we want it to or not. So, I am finally finding time to sit down and get a post in that didn't take time away from what today was all about! This of course is happening between a few re-directions to the kiddos to go to sleep ... I would love to be in bed if I were them and I love them dearly, but please just go to sleep! ;)


A Tribute to a Village on Mother's Day


We all have a mother, here or gone, near or far, born from or adopted, lost or found, someone who has made a difference, loved us when we least deserved it, cared for us when no one else did, and the list goes on and on! I have found this last week before Mother's Day being Teacher Appreciation Week and with Father's Day right around the corner to be very fitting with how own lives are established. A mother's role is only one of the crucial parts for children to become who God intended them to be and I appreciate a day set aside to honor the role that a mother devotes her time to doing. However, as a mother of 4, Mother's Day reminds me that there is no way in a million years I could do this job (you know it's a full-time one and the job description changes without warning) on my own! On tough days I will remind myself, "Grandma had 12 children" and "Mom was a single parent for many years" which then leads me to "LET'S GO, I CAN DO THIS! There's no turning back and no giving up!" 

My grandma and my mother have both been indisputable pillars of strength and God-loving examples of the Proverbs 31 woman! Yes, we all have our shortcomings, our insecurities, circumstances we'd wish were different, and things we would change if given a second chance; but when it is all said and done it's all about who is seen in us through our child's eyes. It's this image that will last a lifetime and be the rock of who they will become! Thanking God for the examples He has placed in my life.

When one stops and takes notice of all the examples that have molded them into who they are, it's hard not to remember the phrase "it takes a village to raise a child"! I have thought of this quote often and firmly believe in the value each person we come in contact has on our life. It is for this reason I would also like to thank all of the women that are 'moms' to our children at any given time, on any given day, knowingly or unknowingly, you are making a difference!

Happy Mother's Day!


Saturday, May 9, 2015

Homemade Pizza Dough

How to Make Your Own Pizza Dough

Sorry so late and so short and sorry it's not mayo ... we've had an very eventful day of baseball games and raising awareness for ALS, also known as Lou Gehrig's Disease. A college baseball teammate of the Mr.'s was diagnosed with ALS five years ago at the young age of 29, you can see his story here. A very touching story and makes you stop and realize every moment is a blessing!

Mayo had to be pushed to the side and I decided to use what was for dinner as today's post. My sister has been using this recipe for years and as tweaked it to make most of her doughy items ... including cinnamon rolls that don't take four plus hours! I will share the source once I find out what it is, my recipe is coming straight from a picture I received via text coming from halfway around the world from my sister (oh the wonders of technology!).


Homemade Pizza Dough

.
I will add more tomorrow.
:) 
Updated 8/16/2015:
2 1/2 to 3 cups flour
1 package active dry yeast (2 1/4 teaspoon)
1/2 teaspoon salt
1 cup warm water
2 tablespoons vegetable oil
cornmeal 

Combine 1 1/4 cup flour, the yeast, and salt. Add warm water and oil. Beat on low for 30 seconds. Scrap down sides. Beat on high for 3 minutes. Stir in 1 1/4 more cups of flour. Pour the remaining 1/2 cup flour on a clean counter top. Turn out dough onto a floured surface. Knead for 6-8 minutes or until smooth. Let rest for at least 15 minutes. Sprinkle pizza pan with cornmeal. Shape crust and place it on prepared pan. Bake at 400 degrees for 20 minutes. Makes one 16" thick crust or 2 thin crust. 
We usually will bake it for 10 minutes on the pan and then slide it off and bake it directly on the oven rack for the last ten minutes, we like our crust crispy! We also almost always double this recipe so we for sure have some leftovers! 
To make our pizza making dinners even simpler, I created a pizza sauce mix that has come in very handy!

Updated 9/17/16:
A Pizza Bar makes for a great and fun dinner option! 

. pepperoni . italian sausage . kielbasa sausage . green peppers . jalapenos .
. pineapple . tomatoes . black olives . mushrooms . mozzarella . pepperjack . 

All together this makes for everyone getting a pizza to themselves exactly how they like it and to make it even better it's a great way to use up those small amounts of fresh ingredients that might be hanging out in your fridge. Win - Win. 

Friday, May 8, 2015

Pasteurizing Eggs

How to Pasteurize Your Own Eggs

The first step to making our own mayonnaise! Now all we need are those chicks #4 wants to go back to the store for so we can have farm fresh eggs ... one day this may be a reality, for now the Mr. isn't sold on this idea!

To pasteurize our eggs I followed Baking Bites instructions. 


Pasteurizing Eggs

eggs
sauce pan
water
food thermometer (digital works best)

Put desired amount of eggs in sauce pan and fill half way with water. Place sauce pan over medium heat with thermometer in place. Watch carefully. Bring water temperature to 140 degrees (see note) and keep the temperature consistent for 3 minutes by adjusting heat or removing from burner. After 3 minutes remove from hot water and immediately cool under running water. Use or refrigerate. 

Note: Eggs start to cook at 145 degrees so it is important not to go above 142 degrees. If you are concerned about your water getting too hot you could lower the temperature but would then need to cook it for longer. I remember reading (will have to find again and link) you could pasteurize eggs at 130 to 140 degrees for 5 to 45 minutes. I did crack one egg open to see how it looked after the process was complete!

egg after pasteurization

I will be using these tomorrow!!! Be sure to check back on our homemade mayonnaise. :)

Today's Question: Have you ever purchased pasteurized eggs? 

Thursday, May 7, 2015

Homemade Ricotta Cheese

How to Make Homemade Ricotta Cheese

Lasagna here we come! In the past few times of making lasagna I have finally tweaked it to where the fam is asking for more ... our secret is Italian Sausage. We use the Italian sausage links from Aldi and remove the casing and then fry it up like hamburger (also used this sausage on some homemade pizza and calzones this week, very tasty!). 

With most main courses, I tally up the total cost as I toss the ingredients into the grocery cart. My max dollar I like to spend is $10 per dinner which for a family of six seems fairly reasonable. If I can do it for closer to $5, you better believe I am all over it and we will be eating it a more often! If I am spending $10 every dinner for 30 meals a month that's $300 just on dinners ... don't know about you but we like to eat 3 meals a day and dinner out occasionally so it makes me feel accomplished to save even just $1 per meal. Over the course of a month this adds up to an extra night of carry out which means I get the night off (SWEET!). Lasagna usually runs us about $4 for meat, $2 to 4 for ricotta, $2 to 4 for mozzarella (depending on my cheesy mood), and $2 for noodles. So $10 to $14 before any sides, needless to say due to cost this is not a go to meal on a regular basis.

Lasagna, you don't stand a chance! It's all about cutting the cost this week ... homemade noodles, homemade ricotta, AND will be using homemade bread for our garlic bread! I used a combination of a few recipes from Ina Garten, The Italian Dish, and Food for My Family.


Homemade Ricotta Cheese

8 cups of whole milk
1 cup heavy cream
1/2 teaspoon of salt
2 tablespoons of lemon juice
2 tablespoons of white wine vinegar
colander 
cheese cloth (or coffee filters)

~ I started with the lemon juice and it didn't curdle so I added the white wine vinegar, and poof CURDS. I will be trying this next time with just regular vinegar, so be sure to check back for an update on the recipe and instructions!~


Moisten cheese cloth (I used coffee filters thanks to my brilliant sister's idea!) and line colander(s). Put milk, cream and salt in stockpot and bring to a boil (about 190 degrees) over medium heat, stirring occasionally so the milk does not burn. Stir in lemon juice and turn heat to low and simmered for a few minutes. Remove from heat and stir in vinegar until curds form. Pour curds into lined colander to strain off the whey (you can repeat this process a couple of times if your colander is not large enough). Allow time to strain to your desired dryness. Overnight in the refrigerator works great.  Store in airtight container in refrigerator for 2-3 days. 

we are just 'whey'ting here ;-)!
Cost Comparison: ~$1.25 for 15 oz. of homemade ricotta VS. ~$2 for 15 oz store bought

Today's Question: Do you use ricotta or cottage cheese in your lasagna?

Updated 5/17/15: We used the homemade ricotta cheese in some lasagna this week ... SO GOOD! I really wanted to try a new noodle recipe also but time didn't allow for fresh noodles but I can only imagine how good this would have been with those also. All I have to say is, I am never buy ricotta cheese again and I am forever a homemade ricotta cheese convert! So easy and so cheap AND it lasted in my fridge for about 4-5 days before I was able to use it which is an added bonus!

Updated 6/14/15: We made ricotta cheese again but this time I used 2 tablespoons of just white vinegar. Next time I will try it with 4 tablespoons because the curds were smaller and the whey wasn't as clear this time. Still tastes amazing and I was reminded just how simple the process was! 


Wednesday, May 6, 2015

Homemade Soy Sauce

How to Make Your Own Soy Sauce

Soy sauce is one of the ingredients I have made a special trip to the grocery store on more than one occasion because we are out not because we use it all the time but because there's only one or two recipes we use it for and I forget to put it on my list when I use it all up (argh!). We were not out of soy sauce but we are getting ready to make one of our main dish's that uses soy sauce and decided what better time to try out some homemade soy sauce (plus I can really compare the flavor then). 

I found a useful site (www.misshomemade.com) that gave a traditional soy sauce recipe, a vegan soy sauce recipe and quite a few other sauces, definitely need to look into those more! I am using the traditional recipe because I have sesame oil and not balsamic vinegar, odd I know ... can't even remember what recipe I bought the sesame oil for in the first place (one more reason why I need to document all my findings in this blog!). Again I am all about using what is in the cupboard and avoiding a trip to the store.


Homemade Soy Sauce

1 and half cups of boiling water
10 bouillon cubes
4 tablespoons of cider vinegar (balsamic would work also)
1 tablespoons of molasses
1 teaspoon of sesame seed oil
pinch of white pepper (black pepper is fine ... bought some white pepper the other day and want to try it)

Possible Additional Costs: ~$5 for sesame seed oil, ~$2.60 for beef bouillon ... both I had on hand
Cost Comparison: ~$0.11 per ounce for homemade vs. ~$0.17 per ounce for generic store bought
Taste Comparison: It's all about preference: was this bad, no; will I use this regularly for soy sauce, probably not; will I try different recipes, yes.

We use soy sauce as the base in a marinade for chicken, sausage, pineapple kabobs from Taste of Home, SO GOOD and always a favorite! 

Today's Question: How often do you use soy sauce? Recipes to share?

Tuesday, May 5, 2015

Homemade Noodles

How to Make Homemade Noodles


Oh my gracious, there are an overwhelming amount of homemade noodle recipes ... I mean there's not much to pasta and I am sure any variation would taste delish, but for some one who likes to pick the best one the first time, YIKES! 

I decided to try The Pioneer Woman's Homemade Pasta recipe, not only because she's the Pioneer Woman of course, but because it included only two ingredients, eggs and flour! Since I am all about minimizing grocery list items, the less I have to remember the better. This is definitely something I can do without having to follow a recipe, thanks Pioneer Woman for sharing ... I am inspired to say the least!


Homemade Noodles

1 cup flour
2 eggs
water
salt

Put flour in bowl. Make well in flour. Add eggs to well. Use hands to mix until combined. Turn out onto floured counter top. Continue to mix until smooth and not sticky. Let rest while you prepare your water. Fill sauce pan with water that has been seasoned with salt and bring to boil. While waiting on water to boil roll noodles out to your desired thickness and cut into long skinny strips. Place in boiling water and cook for 2 minutes. Remove, drain, and enjoy immediately. 2 servings. 

I found it pretty easy to use a pizza cutter going back and forth to cut the noodles, they are not perfect by any means but for a first attempt it'll do just fine! Because I wanted to use these in my chicken soup, I cooked them straight in my chicken broth instead of the salt water. While we were waiting we gathered around and grabbed the bowls! YUM! Now that I have noodling making under my belt (hehe, yeah right!) I am looking forward trying a few more recipes to compare!


Today's Question: Do you have a favorite noodle recipe? I'd love to try it out!

Monday, May 4, 2015

Homemade Chicken Broth

How to Make Homemade Chicken Broth

I was recently asked if I had ever cooked a whole chicken and up until just a few days ago the answer to that was nope! Even though I grew up on chicken wings and thighs, we have typically been a boneless, skinless, chicken breast kind of family and this is about to change! The recently posed question got me thinking about why I had never attempted this and then when I saw our local grocery store (which always has a great selection of meat) I was sold!

This may get lengthy but I wanted all of this information in one place for next time! I bought a whole fryer chicken for $6.48 (really wish I remembered exactly how many pounds this was ... if I had to guess I'd say about 4).  We are lucky enough to have a smoker, but you could very easily cook your chicken on the grill or in the oven. Using a brine isn't a must but you will not be disappointment if you take the time to do this, SO MOIST & JUICY!

Brine for Whole Chicken - borrowed from Extraordinary BBQ
1 gallon baggie
2 quarts water 
1/4 cup salt
1/2 cup brown sugar

Rinse whole chicken and place in baggie. Pour remaining ingredients into back. Give it a swoosh and refrigerate over night.

Whole Chicken in the Smoker
1 - 3 to 5 pound whole chicken, brined, drained. and ready
6 tablespoons of butter, softened
1 teaspoon of rosemary
1 teaspoon of thyme
1 fresh lemon, quartered
4 to 5 red potatoes

Preheat smoker on low (cooking temp should be about 250 degrees). Cut up potatoes in 1 inch cubes, place in a bowl. Add quartered lemon, 3 tablespoons of butter, 1/2 teaspoon of rosemary, and 1/2 teaspoon thyme, toss until blended. Put potato and lemon mixture into chest cavity. In a separate bowl, combine remaining butter, rosemary, and thyme to make a herb butter. Separate the skin of the chicken from the meat and spread the herb butter between them. Place in preheated smoker directly on rack with a drip pan below it.  Smoke for 4.5 to 5.5 hours or until internal temperature is 165 degrees. Remove from smoker and cover with foil.  Allow 10 to 15 minutes to rest before cutting. Enjoy!

I am still learning how to properly cut a whole chicken, so my dinner presentation wasn't the greatest, but we did enjoy this for dinner along with leftovers for lunch the next day! I stored the leftover bones and meat in a container in the fridge until I was ready to make the broth. I used Taste of Home's recipe but there are plenty to pick from and I am sure I will be tweaking this as I go.


Homemade Chicken Broth

Leftover bones and meat (about 2 pounds worth)
2 carrots, peeled and chopped
2 sticks of celery, chopped
1 red onion, quartered
2 bay leaves (optional, or add more thyme)
1/2 teaspoon of thyme
1/2 teaspoon of rosemary
8 peppercorns, whole
2 quarts of water

Combine all ingredients in a stockpot and bring to a boil. Reduce heat, cover, and simmer for 2 hours. Allow to cool and then remove bones and strain the remaining broth using cheese cloth or a colander lined with paper towel. Chill overnight. Discard bones, vegetables and seasonings. Once chilled, skim fat from top and store in the refrigerator. 

I am looking forward to using this to make some homemade chicken and noodles! Be on the look out tomorrow for the noodles. :)

Additional Cost: $0.79 for onion, we are not be fresh onion eaters so never have these on hand ... I flavor with onion powder mostly.  All the other ingredients we already had on hand.
Cost Comparison: Will let you know once I see how much this makes!

Today's Question: Do you eat soup year round or does it depend on the outside temperature?

Upated 5/5/15 - Used this with my homemade noodles today, YUM!