Monday, June 29, 2015

Homemade Grilled Meatloaf

I'm at kind of a standstill in the bathroom while I am using up what I have already made and waiting on more ingredients. I have also branched out into the household area but am not thrilled with some of what I have tried, so I have decided on these "off" days I might as well be sharing some of our favorites around here that I am usually making anyway!

How to Grill Your Meatloaf

Another summertime, well actually anytime, favorite as long as we can fire up the grill. This is another one of those restaurant inspired meals that we have recreated at home and it is SO GOOD! Weber Grill is an absolute must if we are near one, there's three in Chicago and it's surrounding areas and one in Indianapolis ... and I am just now seeing one is coming to the St. Louis area. 

The recipe I have tweaked is by Jamie Purviance from Weber's Way to Grill. The primary reason for tweaking is due to the fact ground pork is something we generally don't have on hand, so I just have always double the ground beef it calls for in his recipe. Still great, but I would love to try making it with the pork sometime. 


Grilled Meatloaf

Meatloaf
2 pounds of ground beef (yesterday's ground steak is even better!)
2 cups bread crumbs
1 large egg
1 teaspoon onion powder
1 teaspoon garlic powder
1 teaspoon oregano
1 teaspoon salt
1 teaspoon pepper
1 teaspoon Worcestershire sauce

Sauce
1 cup barbecue sauce
1 cup ketchup
1/2 cup brown sugar

Preheat oven to 300 degrees. Gently combine all the meatloaf ingredients in a large bowl. (I prefer to use my hands, but have used my kitchen-aid mixer also.) Divide the meat mixture in half and form two loaves. Place on a jelly roll pan or cookie sheet with edges. Set aside. Whisk sauce ingredients together in a bowl. Use about 1/4 cup or less of sauce to cover each loaf. Reserve the rest to baste while grilling (be careful not to double-dip after touching the raw meat). Bake in the oven for 50-60 minutes or internal temperature is 160 degrees. Remove from oven and allow to cool. (This would be a great stopping point for a make ahead recipe. Freeze or refrigerate until ready.) Preheat grill. Cut meatloaf into 1/2 thick slices. Place meatloaf slices on grill and baste with reserved sauce. Flip and baste. And repeat. And repeat until sauce is gone or you have reached your desired sauciness. 

The grilling process really doesn't take long, about the time you have them all basted it's time to go back to the beginning and start flipping. I have made this the day (or a few days) ahead as well as sliced it and then wrapped it up, zip-locked it, and thrown it in the freeze! If you do freezer meals, this would be a great addition. I have made the sauce ahead and froze it, but it is so simple I would rather make it fresh and then freeze any leftovers if need be. 

Sunday, June 28, 2015

A Side of Love

Love and Compassion


You may agree or you may not, but the true point here is we don't have to agree in order to love one another and show compassion. Love is a strong word but it truly is only a word. Like 1 John 3:18 states, "Dear children, let us stop just saying we love each other; let us really show it by our actions." 

Love is no easy task, if it was we'd all be jumping with joy and there would be no sadness, anger, disgust, or fear. If you've seen the new Disney Pixar film Inside Out, you may notice a connection there, if not I highly recommend it! It's an animated production with a story line based on the inner-workings of our memories and feelings which ultimately create our personalities, I applaud the scriptwriters for their creativity and real-world connections. 

You might be wondering, "Well, how in the world does this relate!" Throughout our day-to-day lives we are controlled by emotions. Joy keeps us positive, sadness brings us down, fear can stop us, disgust causes us to judge, and anger can explode us. While any of these on their own will never be sufficient to create what God intended for our lives, all of them together can create something truly remarkable which is exactly what He wants for us. It's when we work towards balancing all of these the love can finally breakthrough! 

I have in no way perfected this balance and have been guilty of fearing what someone might think if I share my opinion; letting my temper rage when my children are disobeying; allowing sadness to keep me from pushing through; judging other's with disgust; and letting joy take over while pushing all my other emotions to the side. I am sure we all could admit to these emotions at one point or another, but the fact of the matter is what we do when any one of these emotions are given the opportunity to rule our lives. Could you even begin to imagine life feeling only one of these emotions?!?!?

If we truly want to find a balance and show love and compassion to everyone we encounter, we need to be aware of what emotions are playing part in our reactions. Instead of allowing only the emotion that is quickest to the scene to be in charge, we need to allow the emotion that needs to be, take over. Easier said than done, but most definitely a great perspective with a much better outcome! 

Friday, June 26, 2015

Homemade Mac & Cheese

How to Make Your Mac & Cheese from Scratch

I've been tweaking my homemade mac & cheese for a while now and there always seems to be something missing ... until last night that is! I love restaurant mac & cheese so my standard for my homemade version is set pretty high. 


Homemade Mac & Cheese

16 ounces noodles of your choice (elbow, bow-tie,  shells, cartwheels, penne)
1/2 cup butter (1 stick)
6 tablespoons flour
3 cups milk
3/4 teaspoon salt
1/2 teaspoon pepper
4 ounces of cheese cheese, cubed
2 cups shredded cheese (I used cojack last night)
1/2 cup grated Parmesan cheese

Cook noodles according to box directions. While noodles are cooking, melt butter in a saucepan over medium-high heat. Whisk flour into melted butter until smooth and bubbly. Add milk, salt, and pepper. Cook until milk is almost boiling stirring frequently to keep it from burning on the bottom of the pan. At any point after the milk has been added tend to the noodles as needed, strain and rinse with cool water when ready. Reduce heat to medium and add cream cheese. Stir frequently until cream cheese is melted. Once noodles are cooked, strained, and rinsed add the sauce and both shredded cheeses to the noodles. Stir until noodles are well coated. DEVOUR!

I have in the past, tossed this into a cassorole dish and baked it, but last night there really wasn't any need to ... it was delish right off the stove! If you haven't been pleased with the homemade mac & cheese recipes you have tried, take a test run with this one and let me know what you think.


Thursday, June 25, 2015

Tick Repellent

I hate ticks! They really gross me out!! A few years back was my first encounter with a tick, I saw something on our dog and when I went to go investigate I realized what it was. The Mr. wasn't home and was going to be gone over night so I had to be the one to tackle removing it. I quickly started searching the internet for solutions. It wasn't big and blood-filled so I knew it had to be rather fresh which helped. I then went to work using a tweezers to remove the tick by it's head and then placed it in a jar with some rubbing alcohol to kill it.

We live in an area where ticks are very likely but definitely not in an overabundance. However, last night I found a tick on me ... EEEEKKKKK!!! I had been out mowing yesterday evening and when I was getting ready to shower I noticed something small and dark on my arm, and SURE ENOUGH it was a tick. A first for me and I had the heebie-jeebies the rest of the night! 

So, the first thing on my mind this morning was there's something I could make as a tick repellent which is when I came across Primally Inspired. She has been using rose geranium essential oil on both her dog and herself and hasn't found a tick since using it. 

I absolutely LOVE essential oils and have been using them since our #1 was little, so just over ten years. This led to making bath salts, sharing them as gifts, and then eventually tried my hand at selling them on Esty when #3 was little. I would have loved pursuing the Etsy thing more but it was easier to just gift and sell my bath salts locally. Through all of this I have discovered I am an essential oils hoarder and am very stingy with even our own personal uses because they can get costly. I am a firm believer in the benefits and natural uses of essential oils but it truly is an investment, a very good investment though!

I was very blessed to meet up with my cousin and her essential oil mentor yesterday for a essential oils chat. I am always excited to hear about others' ideas and uses when it comes to their own day to day lives. 


Rose Geranium is just a blend of rose oil and geranium oil so if you would have both of those you could great your own blend. 

Today's Question: What is your favorite use for rose or geranium essential oils?

Wednesday, June 24, 2015

Homemade Refried Beans

How to Make Your Own Refried Beans


I was so graciously given this recipe from a friend when I shared about using dry beans and I have to say, SO easy AND very impressed!

Refried beans are one of those items that never look appetizing, but are OH SO GOOD!

Refried Beans - Original Recipe


1 onion, peeled & cut to your liking (diced, halved, whatever)
3 cups dried pinto beans
2 tablespoons minced garlic
5 teaspoons sea salt
2 teaspoons ground pepper
1/8 teaspoon ground cumin
2-3 jalapenos, diced
1/8 teaspoon cayenne pepper
8-9 cups water (could substitute vegetable or chicken stock)

Add all ingredients to slow cooker. Cook on high for 8 hours, stir occasionally. Strain, reserve liquid. Mash beans with potato masher, add reserved water as need for desired consistency.

This next recipe is what I did based on what I had as well as my crocks are 2.5 quarts which are slightly smaller than your standard crock-pot. I split my recipe into two - 2.5 quart crocks. I'm adding my tweaks so I can remember what I did for next time. :)

Refried Beans - My Tweak

1 onion, chopped finely
4 cups dried pinto beans
1 teaspoon garlic powder
6 teaspoons salt
2 1/2 teaspoons pepper
1/8 teaspoon cumin
3 jalapenos, chopped finely (will add fewer next time)
1/8 teaspoon cayenne pepper
11 cups of water

Add all ingredients to slow cooker. Cook on high for 8 hours, stir occasionally. Strain, reserve liquid. Mash beans with pastry cutter (I don't have a potato masher), add reserved water as need for desired consistency. Made about 4 cans worth. 

This ended up being a little spicier than I typically make things only for the kids sake. With that being said, they all gobbled up the tostadas I made using these without much complaint; and the Mr. gave a good review as well!

Homemade Flour Tortilla Shells

How to Make Your Own Flour Tortilla Shells


From start to finish, my time invested in these 16 flour tortilla shells was approximately an hour and a half. In the sense of time, was this worth the maybe $2 I saved on not purchasing them at the store ... ah, no! Will I make them again ... ah, yes! Definitely not an every time thing, but I can see myself tweaking these to make some great burritos like Pancheros. I get my inspiration from restaurants and then come home and keep working on recreating them, this is a big way we save money around here! There really is no reason you can't eat great food on a budget.

As for ingredients, these are way better for you! I used the recipe from The Cafe Sucre Farine


Homemade Flour Tortilla Shells


3 cups flour
1 teaspoon salt
1 teaspoon baking powder
1/3 cup vegetable oil
1 cup warm water

Combine dry ingredients in mixing bowl. Using dough hook mix well. Add the oil and water. Mix at medium speed for 1 minute, scraping sides throughout. Mix for another minute or until dough forms a ball. Reduce speed to low and mix for one more minute. The dough will be smooth but fairly wet still. Turn the dough out onto a well floured work surface. Coat with flour. Divide dough into 16 equal pieces. Use the palm of your hands to form into balls and flatten slightly. Cover dough balls with towel and let them rest for 15 minutes. After rest time (this is for everybody, heehee), use a well floured rolling pin a roll dough into 6-7 inch tortilla shells. About half way through start preheating your dry, ungreased skillet to medium heat. Once all the shells are formed and your skillet is hot, cook one shell at a time. Cook for about 1 minute or until the shell begins to bubble. Flip and cook for an additional 30 seconds. You will end of with a soft shell with golden brown spots. WARNING: please do not let yourself be distracted while a shell in on the stove! ;-p Store in a sealed container at room temperature for 24 hours or refrigerate or freeze. Makes 16. 

Notice the bubbles ... it's time to flip

perfectly browned!
And no, they weren't all pretty! ;-p
This is an example of what happens when you get distracted! 
Cost Comparison - approximately $0.40 for 16 homemade shells VS. approximately $1 for 10 store bought shells

Sunday, June 21, 2015

Homemade Eye Make-Up Remover

Happy Father's Day


First off, I need to give thanks and wish a Happy Father's Day to the Mr. We are so blessed and couldn't ask for more! We spent Father's Day at his second home ... the baseball field! He started his morning well before mine working on getting the field ready for a double header today and then the kids and I took breakfast to the ball diamond and helped where we could. I always have to chuckle when things end up this way, it won't have been planned like this, but all the same we were able to be together in a memorable way! Thanks hon for all that you do, we love you the most-est!!!


Homemade Eye Make-up Remover


2 tablespoons witch hazel
2 tablespoons almond oil (or your favorite oil)
8 cotton balls
 
Pour witch hazel and oil into a small bottle. Shake. Place cotton balls in small container. Pour eye make-up remover over cotton balls. Close tightly. Shake until cotton balls have absorbed all the liquid. (You could keep this in a bottle and pour directly onto a cotton ball for each application.) To use: squeeze excess liquid out of cotton ball and use to remove make-up around your eyes. 


I can't say I am sold on this recipe, but it was worth the try and I will use it until it is gone. There are two reasons I'm not sure about: 1) I would prefer a non-oily base and 2) my Norwex body cloth I use for my face wash does just as good of job. 

Saturday, June 20, 2015

Homemade Pectin-Free Strawberry Jam

How to Make Your Own Jam without Pectin


It's taking all of my commitment to sit down and make today's post. It's been a full day of a baseball game and a Father's Day get together and I am beat after an exhausting emergency room visit with #4 last night.  Big brother was being a sweetheart and was taking his little brother outside to play just because that's all #4 wanted to do. Doors and fingers just don't mix and we ended our night with an almost 7 hour emergency room visit that consisted with my baby being hooked up to an IV and all those monitors and sedated while an orthopedic surgeon repaired his pinky finger! He was a trooper and thanks goes out to all the prayers and help last night.

Commitment is when you push through when you least feel like it. It's about making time for something that's important to you. I worked today on coming up with a recipe for this SO I am making myself get a post in! :) 

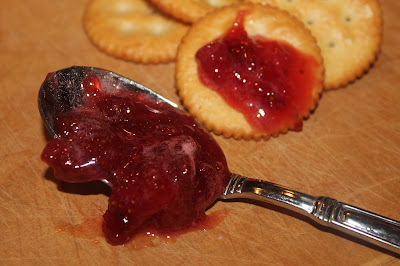
Homemade Pectin-Free Strawberry Jam


16 oz. fresh strawberries, washed, hulled, and mashed
2 cups sugar
1/2 teaspoon cornstarch

Put all ingredients in a saucepan. Bring to boil. Reduce and simmer for 30 to 40 minutes or until the consistency coats the back of the spoon and begins to run of in longer doublets. Put in airtight container and refrigerate.  


Wednesday, June 17, 2015

Face Wash

Not a homemade item but definitely a harsh ingredient eliminator! I have been using the Norwex Body Cloth to wash my face for the past two and a half years and love it! No longer buying outrageously priced face wash and it's healthier for my skin. Also, with the widespreading trend of essential oils (which their are so many health benefits) you are bound to find an oil combination for your skin type or need. Aging, toning, bags, oily, dry, breakouts ... you name it and there's an oil worth trying!


I'll also add, this does an amazing job at removing eye make-up as well. I don't wear a lot, so this does the trick even when it's dry! If you have never heard of or been exposed to Norwex, I HIGHLY recommend you look into their products or find a consultant near you to host a party. It's life changing to say the least and best of all Norwex will save you money in the long. 

As a side note, I am currently looking for a great non-oily eye makeup remover recipe, not because I don't like my Norwex body cloth for removing my makeup but as an alternative just to try. :)


Monday, June 15, 2015

Homemade Moisturizer

How to Make Your Own Moisturizer


This one is going to be a work in progress, but I needed to start somewhere and document what I have tried. I'm a Bath and Body Works user and lover, so this one is going to be a hard one to transition. 

Naturally and Health Living was my inspiration only because it used the ingredients I already have. I have become very fond of aloe vera gel and it's benefits through the reading I have done, so it seemed to be worth a try.

Again, just to add I am no professional throughout all of this, just some one stepping out into the unknown and learning for myself. If you have suggestions, please do not hesitate to inform me! :)


Homemade Moisturizer Try #1


4 tablespoons aloe vera gel
2 tablespoons almond oil
2 tablespoons coconut oil, melted
2 tablespoons shea butter, melted
20 drops of cypress essential oil
20 drops of grapefruit essential oil
20 drops of palmarosa essential oil
20 drops of chamomile essential oil

Combine all ingredients in a bowl. Allow to set for 5 to 10 minutes to allow the melted coconut oil and shea butter to return to room temperature after being heating just enough for them to melt. Beat until thick and creamy. 

My essential oil choices were to help with varicose and spider veins. I was "blessed" genetically with these ;-p and the four pregnancies really didn't help either. My life and what I do isn't stopped by these veins, but I do feel more comfortable wearing jeans, capris, and longer skirts to hide these oh-so-lovely additions to my legs. I have always wanted to and have never taken the time (because it will be slow going to show results) to use oils to minimize or eliminate the appearance of my varicose and spider veins. 

You really wouldn't have to use any oils or you could use a combination of your liking. I found this chart to be very helpful if you wanted your oils to double duty for you for smell and health benefits.

Updated 6/16/2015 - I have noticed a little irritation after shaving and then using my moisturizer #1 so next I will need to try something like this from Little House Living.

Homemade Moisturizer Try #2


3 parts coconut oil 
1 part witch hazel 

Melt and mix. Use as aftershave lotion.

Saturday, June 13, 2015

Single-Serve Frozen Fruit Cups

How to Make Single-Serve Frozen Fruit Cups


This is a summer must-have around the Haley House. We eat this in the form of single-serve frozen cups or popsicles. The best part of this recipe is as along as you start with the crushed pineapple, orange juice, lemonade, sugar, and water, you can use whatever variation of fruit you want. 

I'm not sure exactly where the recipe origin came from, but it was passed along to me from one of my aunts years ago. 

2 oz. single-serve frozen fruit cups 

Frozen Fruit Salad


6 ounces frozen orange juice concentrate, thawed
6 ounces frozen lemonade concentrate, thawed
10 ounces maraschino cherries, halved or quartered
1/2 cup red grapes, halved or quartered
10 ounces strawberries (frozen or fresh), quartered 
3 bananas, diced
20 ounces crushed pineapple with juice
11 ounces mandarin oranges, drained
1 cup sugar
2 cup water

Mix all ingredients together in a large bowl. Pour into 9 oz. cups. Freeze. Makes 12. 

We almost always double this and use the full can of frozen orange juice and lemonade concentrate (which there is a way to make your own ... so that may be one of these days, just to try it out). Can't you just see it, growing your own orange tree, juicing the oranges, and then making your own orange juice frozen concentrate so you can enjoy fresh orange juice even in the dead of winter from the very oranges you grew! 

I know I am a little extreme when it comes to thinking what all I could do, but I have come to realize maybe that's what I love about the covered wagon days. Most everything was made with what you had and there were no quick trips to the store because it was at least a days trip away. Or in terms of the Oregon Trail (ooohh now here's a fleeting amount of memories, as I think back to the computer game I played growing up), you had to be fully stocked with the bare necessities and prepared for weeks or months without being able to replenish it. 

Anywhoo, back to our frozen fruit cups. :) I used to use Dixie cups and popsicle sticks, but this does create extra grocery list items and extra waste ... plus in this form I preferred them to be eaten outside otherwise we had a sticky mess everywhere. Last summer, I started using cupcake pans (and Pampered Chefs brownie pan) as the alternative to popsicles. I ladle the fruit mixture into the pans and the place them in the freeze overnight (a double batch, makes about four dozen 2 ounces servings). The next day I use a knife to pop them out and then store them in a airtight container in the freezer. This not only creates no waste but it has made it very easy to serve. 

Now no matter the season, I love the idea of going to the freezer, pulling out our container of single-serve frozen fruit cups, plopping each one in a bowl, and enjoying a refreshing side of fruit! Most of the time I will heat them up in the microwave for about 20 secs to soften them just enough to break them into smaller frozen chunks for the little ones. These also make for a great addition to school lunches, I put a frozen puck (or two) in a sealed container and by lunch time it's thawed and ready for eating!

before going into the freezer

Cost Comparison: $0.52 per 4 ounce serving (2 pucks) VS. store bought at $0.56 per 4 ounce serving

Friday, June 12, 2015

Homemade Sugar Scrub

How to Make Your Own Sugar Scrub


I am a barefoot-flip-flip kinda girl which means summer's are brutal for these poor feet of mine. I have already noticed the tell-tale sign of dry and cracked heals ... boooo!!! My feet are the last thing to get my attention and definitely the last thing I want to spend money on, but I am going to try and create some products at home to help do the trick.

This recipe was adapted from a friend of mine that was so willing to share it with me. She uses vitamin E, but since I had aloe vera gel I used that instead. Both vitamin E and aloe have great benefits, but I would love to try this out with vitamin E as well. As for the essential oils, I have an aromatherapy book that I absolutely love and when I looked up foot care, rosemary was used in almost every oil combination so I decided to add it along with the lavender.


Homemade Sugar Scrub


3/4 cup sugar
1/3 cup almond oil
1/2 teaspoon aloe vera gel (or vitamin E)
5 drops of essential oil (I used lavender and rosemary)

Combine all ingredients. Store in airtight container. Use as need on hands or feet. 

This is the second product I have made using the almond oil. I'm still trying to pinpoint the exact feeling the almond oil leaves and I have no other oils to compare it to. I don't dislike it but I'm not sure I LOVE it either ... it might just be that is different than what I am used to. :)

Today's Question: Do you have a favorite oil for health and beauty use?


Thursday, June 11, 2015

Homemade Shaving Cream

How to Make Your Own Shaving Cream


Well, I was hoping to get this in earlier today, but there has been no rest for the weary and we are weary! The highlight of my day was for sure getting to meet our newest niece. My sis and her family finally welcomed their bundle of joy into the world yesterday evening. Oh my, her cheeks and her lips are adorable and you don't even want me to get started about that amazing new baby smell! I could enjoy an entire lifetime of just sitting and holding a newborn baby. I know babies are a lot of work but as we approach the teenage years with out oldest daughter, the baby stage is looking like a piece of cake compared to some of our preteen challenges! ;) Yikes, that could be a whole other post on it's own!

On to the shaving cream, I am off to try this as soon as I am done posting so will have to update the result. This first batch I am trying is from Homemade Mommy's site which was actually a guest post from Naturally Mindful. I wasn't able to find the homemade shaving cream post on Naturally Mindful's blog but she had a lot of other great posts in general and will definitely be checking back to her page. 


Homemade Shaving Cream


4 tablespoons shea butter
3 tablespoons coconut oil 
2 tablespoons sweet almond oil
10 - 12 drops of essential oil (see this link for suggestions, I used rosemary and rose geranium)

Melt shea butter and coconut oil in a double boiler (I use a saucepan with stainless steel or glass bowl that rests on top of the saucepan). Remove from heat. Add almond oil and essential oils. Place in refrigerator to cool and solidify. Once in solid form, remove from fridge and allow few minutes to warm up. Beat mixture for 2 to 3 minutes or until whipped. Transfer to an airtight container. Good for a month. 

While working with this, I have noticed your body temperature softens and melts the cream. I am very curious how this will compare to the typical store bought shaving cream. Worse case scenario, I try a new recipe in a month. The good for one month is because it loses its whipped consistency, I was wondering this myself so a read through some of the comments on the post I linked above and discovered the reasoning. 

Cost Comparison: approximately $2 for a 8 ounce jar VS. $1.50 to $3.00 per can depending on size (typically 7 ounces), type (cream or gel), and brand

Updated 6/13/2015: Call it chance or I might just be blessed, but it has been two days since I shaved with my homemade shaving cream for the first time and I am hardly even noticing a stubble. Does this stuff really make for that much closer shave? Now that it's shorts weather and I will be shaving more often :) and  am curious to see how often I will need to! As I mentioned in my original post, your body temperature does soften and melt the cream, so you don't really see the cream on your skin like you do store bought. This leaves to feeling where you haven't shaved rather than seeing where you haven't shaved. I do however like the fact I could shave while letting the water run over my legs and it didn't wash the cream off. Also, as with my sugar scrub, I'm not sure if I am loving the feel of the almond oil, but I really don't have any other oils to compare it to, so it just may be it's different than what I am used to. Until the next shave, we will see how things go!


Tuesday, June 9, 2015

Water for the Soil (or Soul)

How to Make Your Own Watering Can

Nothing fancy for today, but I was in need of a watering can. Our 5 year old doberman, who prances around always with something in her mouth, got a hold of ours and although it does the trick I needed something more delicate to clean the leaves of our plants in the garden after the storm that came through Sunday night. So I indulged myself in a glass of Dr. Pepper at lunch today to empty the 2-liter bottle in the fridge and used a screw and cordless screw driver to put 7 small holes in the lid. 

my "sad" garden :)
2-liter squeeze bottle, great for delicate watering
our injured water can


As I cleaned off the leaves of our plants I was reminded, I might just be the worst gardener! I am very thankful (or maybe hopeful) my skills of taking care of plants has no correlation to the care I give my own children. :) I have seen some of my friends' gardens flourishing by now and the Mr. has questioned whether or not our garden is going to be worthwhile considering all the time I have put into it and the progress (or lack of) it is showing. Through all of this, instead of seeing it as a failure (I will not give up on my garden), I finally saw an avenue to touch on a heart issue I have been wanting to share.

So often we compete with one another to be better at whatever it might be and the world around us has pushed this mentality to "out do" the last person. It's all around us ... posts, pictures, stories that we see as others doing "better" at something than we are. Being a mom, dad, husband, wife, sister, brother, son, daughter, athlete, dancer, artist, crafter, singer. In our homes, at our jobs, with our friends. I mean the list goes on and on!

Here's my revelation, I am committed to live each moment to out-do myself and ONLY myself. If that means, I have a very sad looking garden this year, then next year I am up for the challenge to make adjustments and hopefully have an "unemotional" ;) looking garden next year, and maybe a happy one the following! If I made it through today wishing I could rewind and redo some of my choices as a mom, then tomorrow I will do what I can to make those choices better than they were today. If I have a desire to be better at (fill in the blank), then instead of comparing what I am doing to somebody else, I will compare it to what I have done in the past. We are always improving but don't always notice because we have our focus on how others are performing instead.

I may not always be better than others around me, but I can always be a better me!

Monday, June 8, 2015

Homemade Hair Detangler

How to Make Your Own Hair Detangling Spray

We had to start going this route when #3's (our second girl) hair started getting longer. Let's just say she LOVES her sleep and her hair says it all when she gets up in the morning! We used to purchase this but now have been replacing it with homemade detangler the past few times. 


Homemade Detangler

Empty spray bottle (this one is 10 ounces)
2 tablespoons of conditioner (guesstimate works just fine) 
water

Put conditioner in spray bottle. Fill with water. Shake to mix. Use as needed. 

SO simple, no extra cost AND works just as good! Now I am going to need to make some real conditioner, not just apple cider vinegar rinse. 

Sunday, June 7, 2015

Homemade Conditioner (Apple Cider Vinegar Rinse)

How to Make Your Own Hair Conditioner

My hair was due for a wash last night, so I tried out the new no-poo. I will be using Reformation Acre's Apple Cider Vinegar Rinse just as soon as my aloe vera gel 

But for now, I tried out my no-poo and AVC rinse last night with a little plopping action using a long-sleeve t-shirt to wrap my hair up to sleep in. I did received a few awkward looks from the Mr. AND I am feeling a little like a guinea pig, just sure glad it's summer and I won't feel bad if my hair gets pulled back for than normal.

I ended up using my apple cider vinegar bottle and replaced the lid with one that had a flip top and smaller hole.


Homemade Apple Cider Vinegar (AVC) Rinse 

2 parts water
1 part apple cider vinegar

Pour ingredients into a squeeze bottle. Shake. Use on its own or after no-poo. Pour all over hair and scalp. Allow a few minutes. Then rinse well.

Afterwards, I dried my hair using only t-shirts, added a little gel/conditioner mixture (I will replace this as soon as my aloe vera gel gets here), and then wrapped it up in a long-sleeve t-shirt to sleep in over night.

I have notice my scalp feeling drier than normal but I am wondering if I didn't rinse well enough or if the aloe vera gel will help with that. We shall see! :)

Today's Questions: What is the one homemade health and beauty product you are very curious about but hesitant to try yourself? I'm up for being a guinea pig, WHY NOT?!? :)

Saturday, June 6, 2015

Homemade Shampoo (AKA no-poo)

How to No-Poo

No-pooing is a method of washing hair without commercial shampoo. Here's is my understanding and is in no way a professional explanation! Commercial shampoos strip your hair of it's natural oils causing it to dry out which in turn causes your scalp to produce more oil making it greasy and needing to be washed again. Yes, everybody's hair is different, some producing more oil than others, so there is a fine line here of what works for one may not work exactly the same for some one else. 

Let me give a little hair background. Growing up my hair was stick-straight and thicker than thick ... four kids later, still thicker than thick and now curly! I really need to find some pictures to show proof of this. I love to joke around that I needed to have four kids otherwise my hair would be half curly and half straight. The curl (more like waves at the time) started out in the back and worked its way to the front so by #4 I finally got a full head of curls. I often wonder what hormones my children brought into my body to cause the crazy hair change. I fought the wave after #1, then attempted to work with it after #2, tried to embrace it after #3, and then said forget it after #4 ... ever since then I haven't spent too much time taking care of my hair. 

For years I had my hair thinned to actually be able to "style" it, but after a while I just didn't have the time to maintain a trim every 6-8 weeks and I couldn't go without one because I would turn into a frizz mess! So about 4 years ago I quit having it thinned and couldn't be happier, I have really had to embrace the thickness and go with the attitude of working with it rather than against it. Two and half years ago marks when I felt if my hair were long the weight would tame my mop and I decided to grow it out. Ideally, I would love to donate my hair which I have never done and is definitely on my bucket list. However, if I am going to grow my hair out long enough to donate AND still have length so I don't have a poof-ball for a hairstyle, I am going to need some help getting it to grow faster and keeping it healthy. 

I am completely stepping into the unknown here and would love to hear any of your feedback if you have used homemade products. I have read quite a bit about this whole no-pooing concept and really believe is has to be better than what I am currently doing BUT I am definitely timid about the time it's going to take to figure out a new hair regimen that works not only for my time but my hair also. I am pretty sure the procrastination on my posts lately is due to the fact that I start each day with the goal of starting a new hair regimen but then put it off another day and find something else to do. :)

My past regimen has been to wash my hair every three days using the cheapest shampoo I can buy, use conditioner (again the cheap stuff) after, brushing the conditioner through my hair with my head upside down, and then rinsing. I then flip my head up, use my fingers to part and comb through my hair, flip my head back over, and wrap it up in a towel just long enough to hop out of the shower and dry off. To style it I use a mixture of cheap (I told you I had given up on taking care of my hair) gel and conditioner to style and use a t-shirt to scrunch it and remove some of the extra water before I let it air dry the rest of the way ... about 2 hours (yes it's THAT thick). 

Reformation Acres's regimen is what I have decided to try. Here is another link from her that I can see myself embracing for my new hair life-styling change!


Homemade No-Poo

1 quart boiling water
1/4 cup baking soda

Bring water to a boil in a stock pot. Add baking soda. Stir to dissolve. Allow to cool. Pour into squeeze bottle (or old shampoo bottle). Shake before use. Apply liberally to hair. Massage into scalp. Rinse well. Repeat process approximately two times a week. 

Keep in mind this is only part of the regimen, I will be adding the conditioner and styling products over the next few days. 

Today's Question: How often do you wash your hair?

Updated 9/12/15 - So I have been pooing again! HEHEHEEEE, sorry I couldn't resist! The no-pooing was great and I do feel my hair responded positively to this process, but with as much hair as I have plus it being curly, I REALLY need the detangler action from store bought conditioners. Since the no-pooing and apple cider vinegar rinse has not been meeting my needs, I've been eyeing the shredded coconut I have in my cupboard to make a coconut milk conditioner, so hoping this happens sooner rather than later! But for now my focus is to grow my hair long enough and healthy enough to donate.

I'm about one hair trim away from chopping 8 inches off to donate to Pantene's Beautiful Lengths  and I CANNOT WAIT! As much as I love being able to pull my hair up in a cute, messy bun, I have reached that point of just TOO MUCH hair for me! I am sure after the cut I will be wishing I didn't have to style my hair every day, but being able to check this off my bucket list will be worth it. The hard part will be to figure out what style I want ... for those of you that know we well enough, know that a decision like this will take me weeks! Open to suggestions on a hairstyle! :)


Thursday, June 4, 2015

Homemade Deodorant

How to Make Your Own Deodorant

Going outside the kitchen is going to be even more of a challenge for me! In the kitchen I already had most of the ingredients needed to make everything, but the bathroom, WHOLE different story. I am going to need to sit down and do some research on my products ... butters and oils, there are so many options. I'm not one to buy a bunch of different stuff and use little bits here and there, instead I would rather buy in bulk one or two things and then use them for everything. 

Throughout my brief research today I came up with a list of options, so I could refer back to when making my final decision. The links below have a great information about the many options we have to pick from.

Shea 
avocado
cocoa
mango

almond
avocado
coconut
jojoba
grapeseed

Other ingredients
beeswax
zinc oxide
vitamin E

I went with deodorant today only because I had all the ingredients :)


Homemade Deodorant


7 tablespoons coconut oil
1/4 cup baking soda
1/4 cup cornstarch
3 drops of palmarosa essential oil (next time will add more)

Combine all ingredients using hand mixer. Press into container or old deodorant stick. Store in a cool place. 

I will be curious how this goes on and withstands everyday activity. 

Today's Question: Do you have a favorite butter and/or oil?

Updated 6/5/2015 - First off, wish I could spell deodorant correctly ... my fingers type deoderant every time which is getting old having to correct! :) I used the homemade deodorant this morning and I'm still okay to be around without getting whiffs of a sweating locker room. Disclaimer: Most store bought deodorants are actually a deodorant and antiperspirant which actually reduces the amount of sweat. Since this is just a deodorant I definitely noticed more sweating than when using a antiperspirant; however, our bodies were made to sweat to remove toxins from our bodies so when I ran across this article about doing an armpit cleanse to reduce breast cancer risk, I found to be quite interesting and informative. Now this obviously is not the cure all for stopping breast cancer, but it reminds me just how much additional and possibly hazardous stuff we put in and on our bodies daily without thinking twice. 

Fair warning here! If I really stop and think about this it can be extremely overwhelming, disheartening, and discouraging ... I see all these things on pinterest and Facebook, pin them, like them, or make a mental note, and my list quadruples each day while I am only on a good day marking one thing off. I will say I'm feeling a little on the crazy/weird/abnormal (which all might be true anyway, heehee) side for going to the depths I am with this challenge! Bottom line, I am getting enlightened and can now make more informed decisions about what we eat and use. 

Now off to order my stuff so I can make the rest of my list!

Updated 6/6/2015 - I was asked today why I chose to use palmarosa as my essential oil so I felt the need to add some additional information to my post. There were two blogs I was inspired by when making my homemade deodorant; "passionate homemaking" and "Chocolate & Zucchini." I adapted the recipe from "passionate homemaking" then added the palmarosa from "Chocolate & Zucchini." Palmarosa is an essential oil I have used in a rejuvenating bath salt recipe of mine so I had it on hand. It has a sweet smell and anti-bacterial properties so lent itself for a great essential oil choice for a female. Tea tree oil also is a great anti-bacterial choice and has a more woodsy aroma ... I am out of tea tree oil so didn't have this option. This is day two of using the homemade deodorant and I am still very pleased with the outcome! I'm ecstatic to know there is one less unnatural product I am using AND I am saving money in the process. 

Cost: $1.40 for homemade deodorant, each batch is approximately 1 stick of store bought deodorant ... this is at least a 50% savings!


Wednesday, June 3, 2015

Homemade Toothpaste

How to Make Your Own Toothpaste

Today marks the start of a new routine. School for every one is done, the Mr.'s baseball season is finished (unfortunately after a tough loss last night ... So proud of the SJO Baseball Team), and we are now full-fledged at home during the day with the four kiddos and plus one occasionally! As with most transitions, it takes a few days to find my groove. I am going to need to figure out when the best time is to get my post in.

There are a few things I still would like to try in the kitchen and get posted, but they will get done periodically as I need them. For now I am excited to head over to the bathroom and eliminate ingredients and waste AND save money. Since we spend most of our summer days around the pool or outside, I can afford a few bad hair days if some of the homemade products need tweaking! :)

I was a little overwhelmed at where to start initially but toothpaste sounded like the easiest. This recipe was adapted from Organic Authority.   


Homemade Toothpaste - Kid Friendly


1/4 cup baking soda
1 teaspoon salt
water as needed

Mix baking soda and salt in a small container with lid. Moisten toothbrush. Lightly dip the moisten bristles in the soda and salt mixture. Brush as normal. 

I love the fact I don't have to worry about whether or not the little kids swallow this. We are not always the best at spitting. ;) 


Homemade Toothpaste with Whitening


6 tablespoons baking soda
1 1/2  teaspoon salt
1/2 teaspoon of peroxide
2 tablespoons water 

Mix baking soda and salt together in a small bowl. Add peroxide and water. Store in a small squeeze bottle. 

I used a baggie and cut the tip off in order to get the paste into my squeeze bottle without a huge mess. Then for a fun twist, once I use up all of my essential oils and replace them with Young Living oils that we can digest, I will be adding a few drops of essential oils to these as well. I have already tried this and it tastes just like I remember it when I was a kid. We didn't use this very often and it may have only been when I wanted to try being a pioneer! I am looking forward to seeing if it really whitens, will need to take a before picture before I forget. 

Today's Question: What was/would be the first bathroom item you would replace?

Monday, June 1, 2015

Homemade Weed Killer(s)

Best 'weed killers' around ... AND they were definitely homemade ;-)!  For the sake of us all, I'll refrain from sharing the recipe and directions for today's post! 


These four make life crazy, chaotic, exhausting, fun, joyful, hilarious, blessed, and every other emotion each and everyday ... I mean there are 4 of them so usually it's 4 different emotions all at one time! Yikes, talk about about over stimulated emotions some days! Which is why yesterday during praise and worship at church a particular verse was perfectly timed and hit my heart like a ton of bricks, it spoke of breaking through in my expectations. We are surrounded by expectations and allow them to overpower our actions and desires. The expectations I place on my kiddos are tough and may be on days unreasonable. This song has made me reevaluate my expectations and I have notice the days I struggle with the expectations I have for myself as a mom are the days I have placed slightly out of reach expectations for my kids. It's on these days I find myself seeing them through their failed expectations rather than the affection of my unconditional love for them. This was hard for me to shallow, but a great realization!

Through all the crazy, I couldn't imagine life without these weed killers ... with each other by our sides, we are going to stand up against all those pesky weeds (in our garden and our lives) and make a world of difference!